
Quick Links
What are Segments?
Segments are dynamic filters applied to subscribers based on specific criteria or behaviors. All of them can be combined or added up under certain conditions.
You could use that information to target a specific group of people with your email campaigns. By segmenting your emails in your marketing platform, you can create personalized content that is more likely to resonate with your entire audience.
Segments vs Lists
In MailPoet, a List and a Segment serve different purposes for organizing and targeting your subscribers.
A List is a static collection of subscribers grouped based on a common theme or preference. You can create lists to target specific audiences with your newsletters. For example, you can have separate lists for customers, blog subscribers, or product categories. You can create, edit, and manage lists in MailPoet > Lists. Subscribers can also opt into different lists when signing up.
On the other hand, a Segment is a dynamic, automatically-updating filter applied to subscribers across all lists or within a specific list, based on subscriber actions, custom fields, or other criteria (as email opens, clicks, subscriber tags, or WooCommerce data). Segments help refine and target your emails to subscribers with certain behaviors or characteristics. You can create and manage segments in MailPoet > Segments.
Types of Segments
MailPoet allows customers to create the following segments of subscribers in MailPoet > Segments:
Automations
- entered automation: filter subscribers who entered all of, none of, or any automations you have set up.
- exited automation: filter subscribers who exited all of, none of, or any automations you have set up.
Email Actions
- # of opens: filter subscribers who opened “more than”, “less than”, “equals”, or “not equals” emails within a specific timeframe (in the last N days, before, after, on, or between specific dates).
- # of machine-opens: filter subscribers with machine-opens for “more than”, “less than”, “equals”, or “not equals” emails within a specific timeframe.
- was sent: filter subscribers who were on the list for any, all, or none of particular emails sent. Both standard newsletters and automation emails can be selected.
- opened: filter subscribers who opened any, all, or none of one or more particular emails sent. Both standard newsletters and automation emails can be selected.
- machine-opened: filter subscribers who had one or more particular emails machine-opened.
- # of emails received: filter subscribers who received “more than”, “less than”, “equals”, or “not equals” a number of emails within a specific timeframe.
- # of clicks: filter subscribers by the number of times they clicked links in emails within a specific timeframe.
- clicked: filter subscribers who clicked on any, all, or none of some particular link from one or more specific emails that were sent. Both standard newsletters and automation emails can be selected.
- clicked any email: filters subscribers who clicked on any email since they subscribed.
Subscriber
- Engagement score: segment subscribers according to their score:
- higher than
- lower than
- equals
- not equals
- unknown
- not unknown
- Email, First Name and Last Name: filter subscribers whose email, name or last name “is”, “is not”, “contains”, “does not contain”, “starts with”, “does not start with”, “ends with”, “does not end with” a specific word.
- MailPoet Custom Field: If you have sent emails with previously created custom fields via MailPoet, you can also create a segment that is “equals”, “not equals”, “contains”, “more than” or “less than” the information that was introduced on that specific field.
- Subscribed date: segment your subscribers according to when they joined your lists. Operators include before, after, on, between, in the last N days, and not in the last N days.
- Subscribed to list: quickly filter all subscribers who are added to one or more lists.
- Subscribed via form: filter subscribers who were subscribed through “any” or “none” of one or more specific MailPoet forms.
- Tags: once you have added tags to your Subscribers, you can create segments filtering subscribers by those tags. This will allow you to segment out subscribers who have or don’t have specific tags applied.
- WordPress User Roles: You can send to specific WordPress user roles:
- Administrator
- Author
- Contributor
- Editor
- Any custom role you have created, for example, Customer, Subscriber, Shop manager, etc.
WooCommerce
- Average order value: filter subscribers by their average order value within an optional timeframe. You can use this segment to reward regular big spenders with discounts to incentivize repeat business, for example.
- Country location: if you’re using WooCommerce on your site, you’ll have access to specific segment options to target your marketing campaigns. By selecting “is in country”, you can segregate your customers by location. You can select from the conditions “any of” or “none of” to include or exclude countries. Note it does not require a completed WooCommerce order.
- The number of orders: create a segment list by defining the number of orders made. The conditions are limited to “equals”, “not equals”, “more than X” or “less than X” within an optional timeframe.
- The number of orders with coupon code: create a segment list by defining the number of orders with coupon code made. The conditions are limited to “equals”, “not equals”, “more than X” or “less than X” within an optional timeframe.
- Purchased product category: filter subscribers who previously purchased “any of”, “all of”, or “none of” your product within one or more categories, within an optional timeframe.
- Purchase date: create a segment of subscribers who placed an order (or did not place an order) based on a date or range. The conditions include “before”, “after”, “on”, “not on”, “between”, “in the last”, or “not in the last” X days.
- Purchased product: If you want to create an email campaign or promotion to those who purchased a specific product, you can do it by choosing from “any of”, “all of”, “none of” + adding the name of the product(s). You can optionally narrow results to a specific timeframe.
- Purchased product variation: filter subscribers who purchased a specific variation of a variable product. To use this filter, first select the parent variable product, then choose one or more of its variations (such as a particular size, color, or other attribute combination). The conditions are “any of”, “all of”, or “none of” the selected variations, within an optional timeframe. This is useful for targeting customers who purchased a particular variant, for example, to promote related items or notify them about restocks.
- Single order value: create a segment targeting subscribers based on their single order value (not lifetime spend). The conditions are limited to “more than”, “more than or equal”, “equals”, “not equals”, “less than or equal”, or “less than” within an optional timeframe.
- Total spent: segment your subscribers by the total amount of money they spent in your shop within an optional timeframe. The conditions are limited to “equals”, “not equals”, “more than X”, or “less than X”. Please note that the currency showing up here would be the one you previously selected in your store from the WooCommerce settings.
- Used payment method: filter customers by the payment method they used, within an optional timeframe.
- Used coupon code: filter customers by the coupon code they used, within an optional timeframe.
- Used shipping method: filter customers by the shipping method they used, within an optional timeframe.
For more details on each WooCommerce filter and the available timeframe options (all time, in the last N days, before, after, on, and between), see Segmenting Subscribers by WooCommerce Data.
WooCommerce Subscriptions
If you’re using the WooCommerce Subscriptions plugin, you can segment your subscribers who have active subscriptions in your shop.

WooCommerce Memberships
If you’re using the WooCommerce Memberships plugin on your site, you can segment subscribed members by their membership:
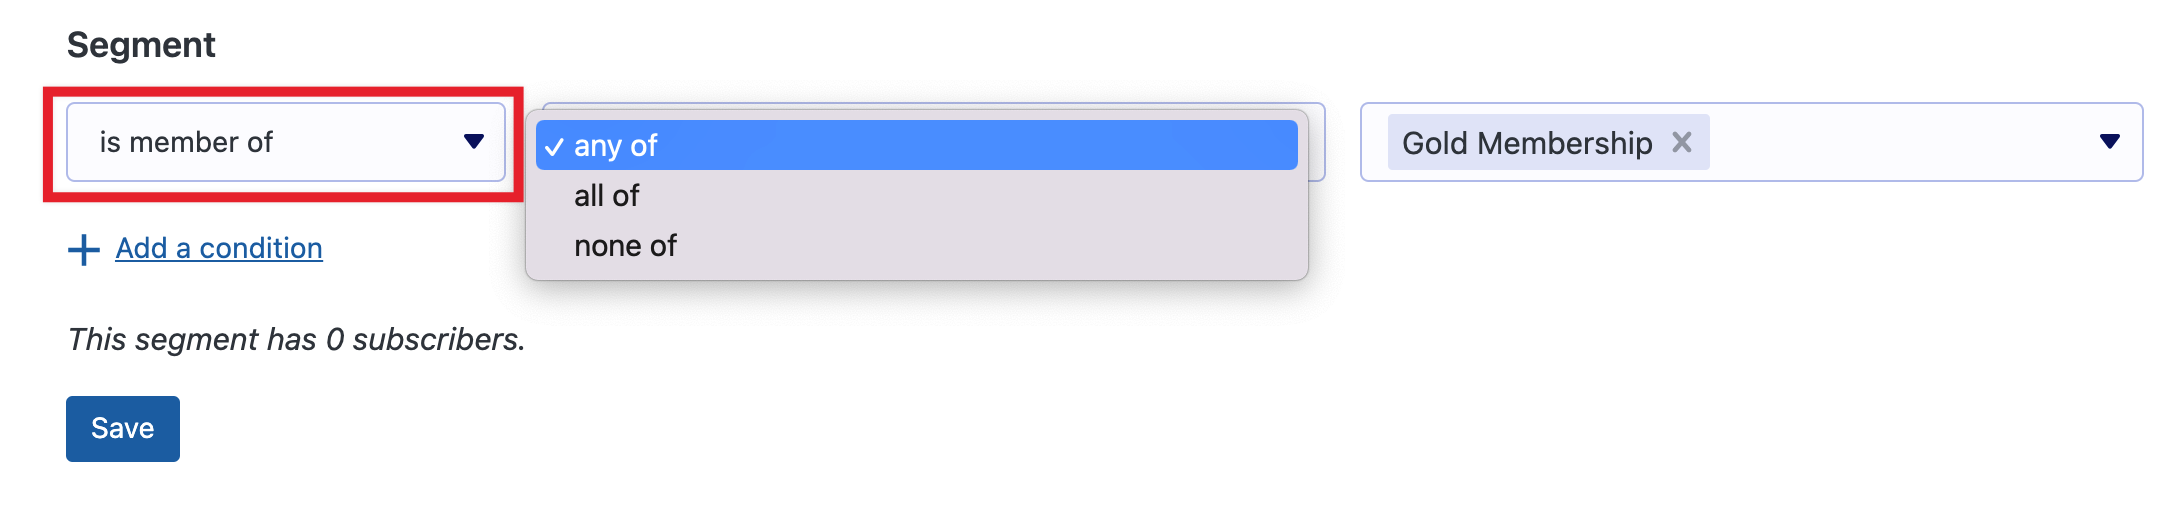
[Premium] Conditions and Filter Groups
You can build more specific segments by combining several conditions and organizing them into groups with different logic. This lets you create segments like “subscribers who are administrators or editors, AND who purchased a specific product.”
Adding Multiple Conditions
When editing a segment, click the Add a condition button below your existing conditions. This adds a new condition row to the current group.

Choosing How Conditions Are Combined
When a group has more than one condition, radio buttons appear at the top of the group. These control how the conditions within that group relate to each other:
- All of the conditions — the subscriber must match every condition (AND).
- Any of the conditions — the subscriber must match at least one condition (OR).
- None of the conditions — the subscriber must not match any of the conditions (NOR).

For example, selecting Any of the conditions with two WordPress role conditions — “Administrator” and “Editor” — matches subscribers who have either role.
Organizing Conditions into Filter Groups
Sometimes you need to combine AND and OR logic in the same segment. Filter groups let you do exactly that. Each group has its own operator, and you then choose how the groups connect to each other.
To create a segment with multiple filter groups:
- Go to MailPoet > Segments and click New Segment, or edit an existing segment.
- Add your first set of conditions. Choose the operator for this group using the radio buttons (for example, Any of the conditions).
- Click the Add group button at the bottom of the conditions section. A new, empty group appears with its own Add a condition button.
- Add conditions to the new group and choose its operator independently.
- Once you have two or more groups, a second set of radio buttons appears between the groups. Use these to choose how the groups are connected:
- All of the groups — the subscriber must match every group (AND between groups).
- Any of the groups — the subscriber must match at least one group (OR between groups).
- Click Save.


Example: Mixing AND and OR Logic
Suppose you want to target subscribers who have either the Administrator or Editor role, and who have also purchased a specific product. Set it up like this:
Group 1 — set to Any of the conditions:
- WordPress role is “Administrator”
- WordPress role is “Editor”
Group 2 — set to All of the conditions:
- Purchased product is “Product X”
Set the group connector to All of the groups.
This creates the logic: (Administrator OR Editor) AND (Purchased Product X). Only subscribers matching at least one role in Group 1 and the purchase condition in Group 2 are included.

Segments’ Limits
Each segment can have up to 5 filter groups, with up to 10 conditions per group. MailPoet will not create a segment that takes longer than 20 seconds to calculate.
If your segment exceeds the time limit, try reducing the number of conditions or splitting it into smaller segments.
Applying a Segment as a Filter
During sending, Segment can be selected directly under the “Send to” field. Alternatively, it can also be filtered within a list when “Filter by segment” is enabled:

Examples to improve engagement
Here are a few simple yet effective ways to segment your list and help you achieve better inbox placement, maximum deliverability and to improve engagements:
- Segment by frequency of emails sent
- Segment by interests
- Segment to improve engagement
- Segment based on past purchases
- Segment by geographic location
- Others
Segment by frequency of emails sent
If you’re sending high-frequency emails (e.g., one or more emails per day), include options such as daily, weekly, and monthly to your subscription form, making email frequency a customer preference.
To do that, you should create a new custom field (use the “Radio buttons” or “Select” type) to be added to your subscription form:

After giving your subscribers the opportunity to choose how frequent they would like to receive your emails, you can create a Segment for each option:
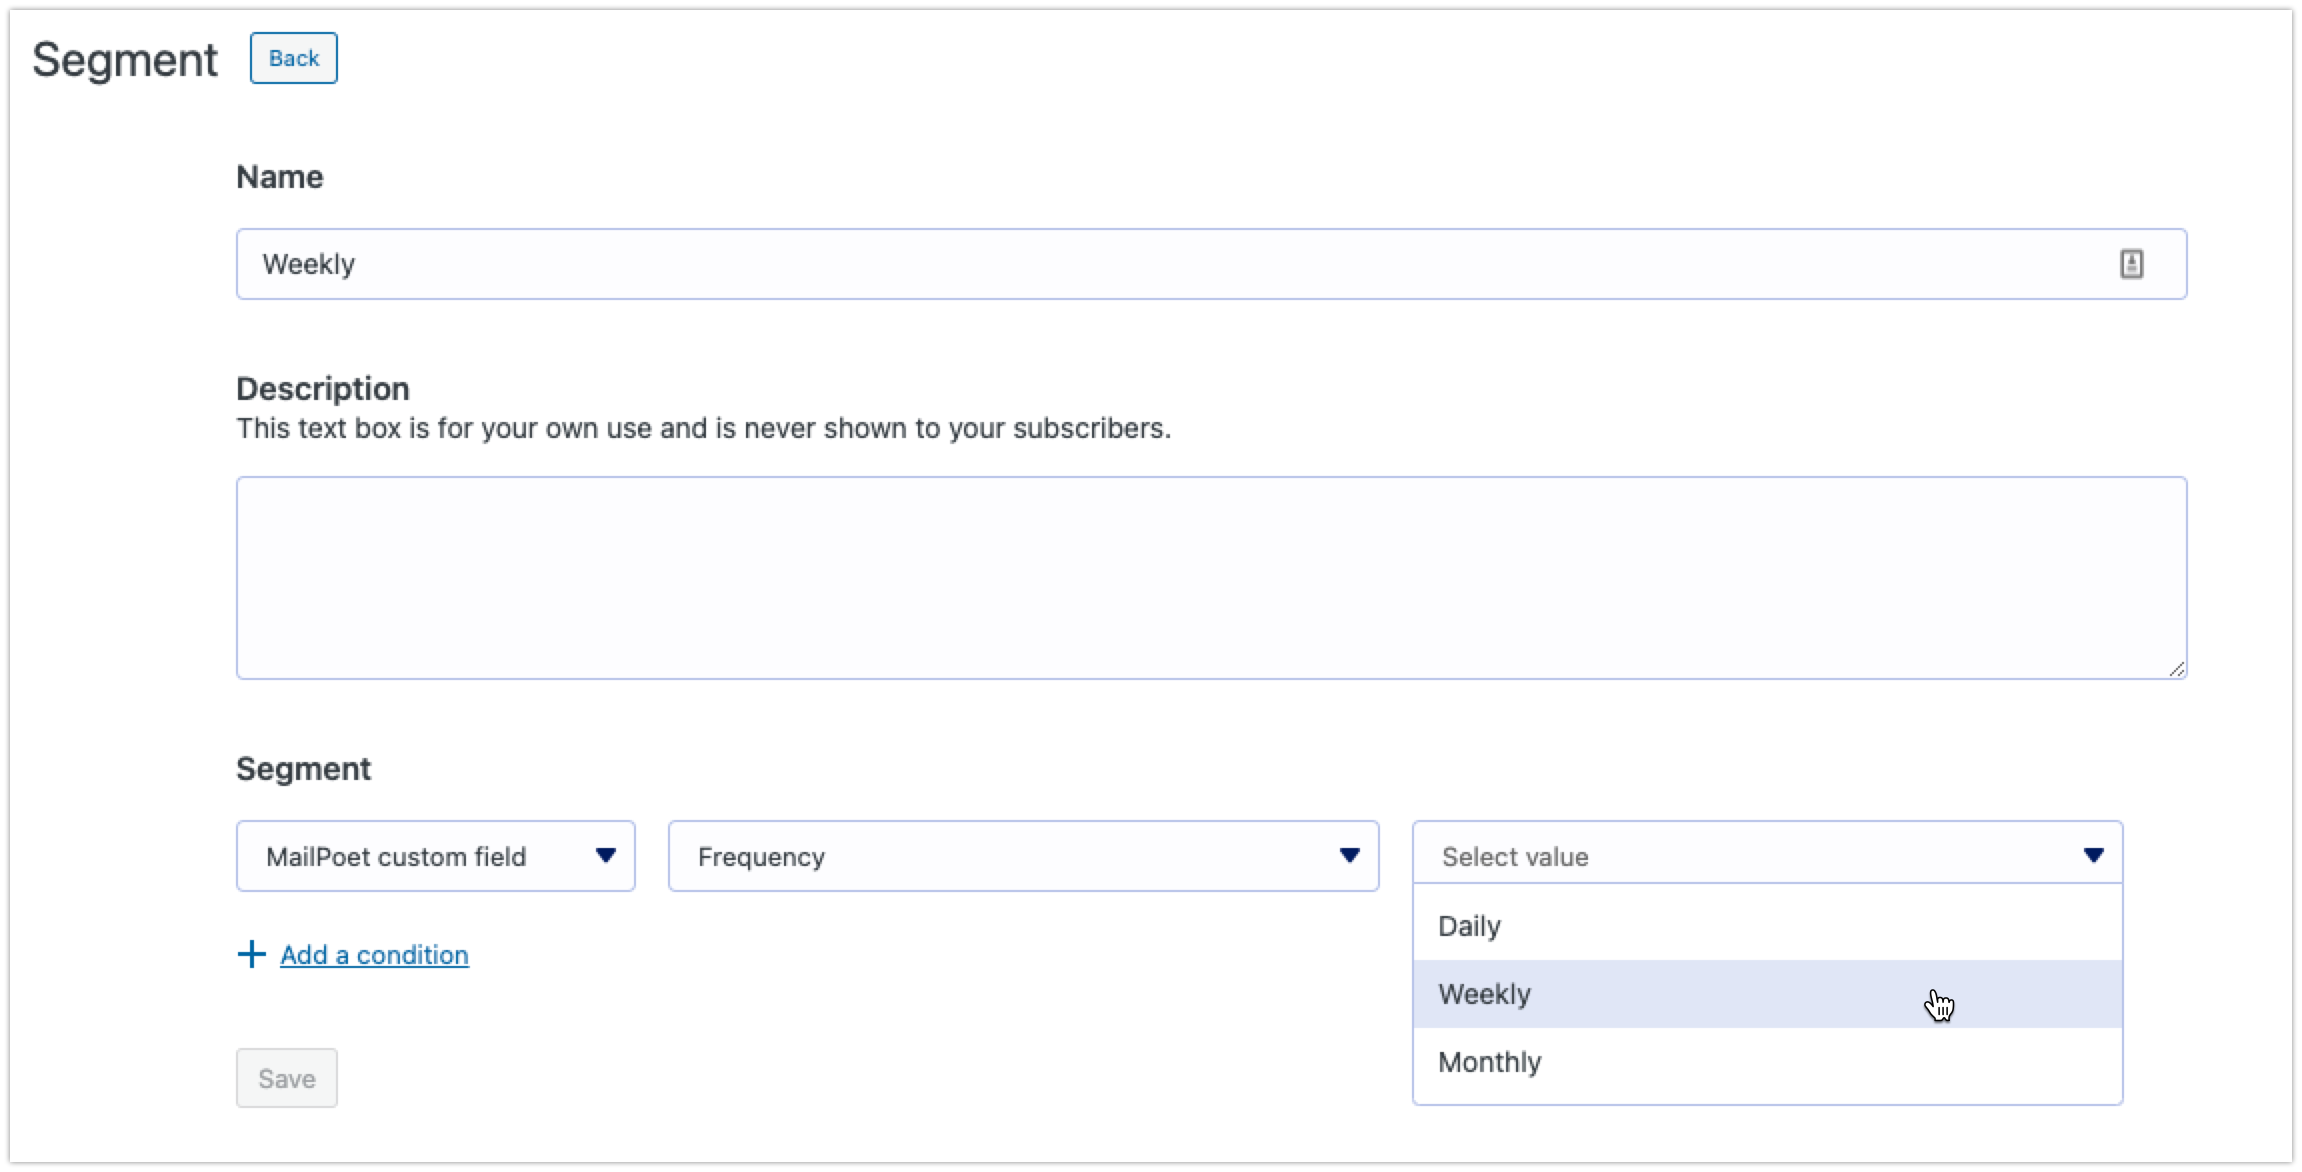
And if you have a Post Notification email set up, consider creating 3 different emails, each one associated with the proper segment and following the right conditions (daily, weekly, monthly).
Segment by interests
Do you have several product categories? Consider letting your subscribers choose to receive emails based on the categories that are of the most interest to them. Customers expect email messages to be relevant to their interests.
Similar to the sending frequency, you can add a custom field to your form and have category options to be selected at the moment of subscription, so you can create segments based on this custom field later.
This way you can create multiple targeted subscriptions and allow subscribers to choose which post categories they want to receive emails from.
When creating the different Post Notification emails, you can filter the post categories for each email in the Automatic Latest Content’s block.
Segment by engagement
We recommend that you create segments for your subscribers for the following two following conditions to improve engagements:
1. Highly engaged subscribers:
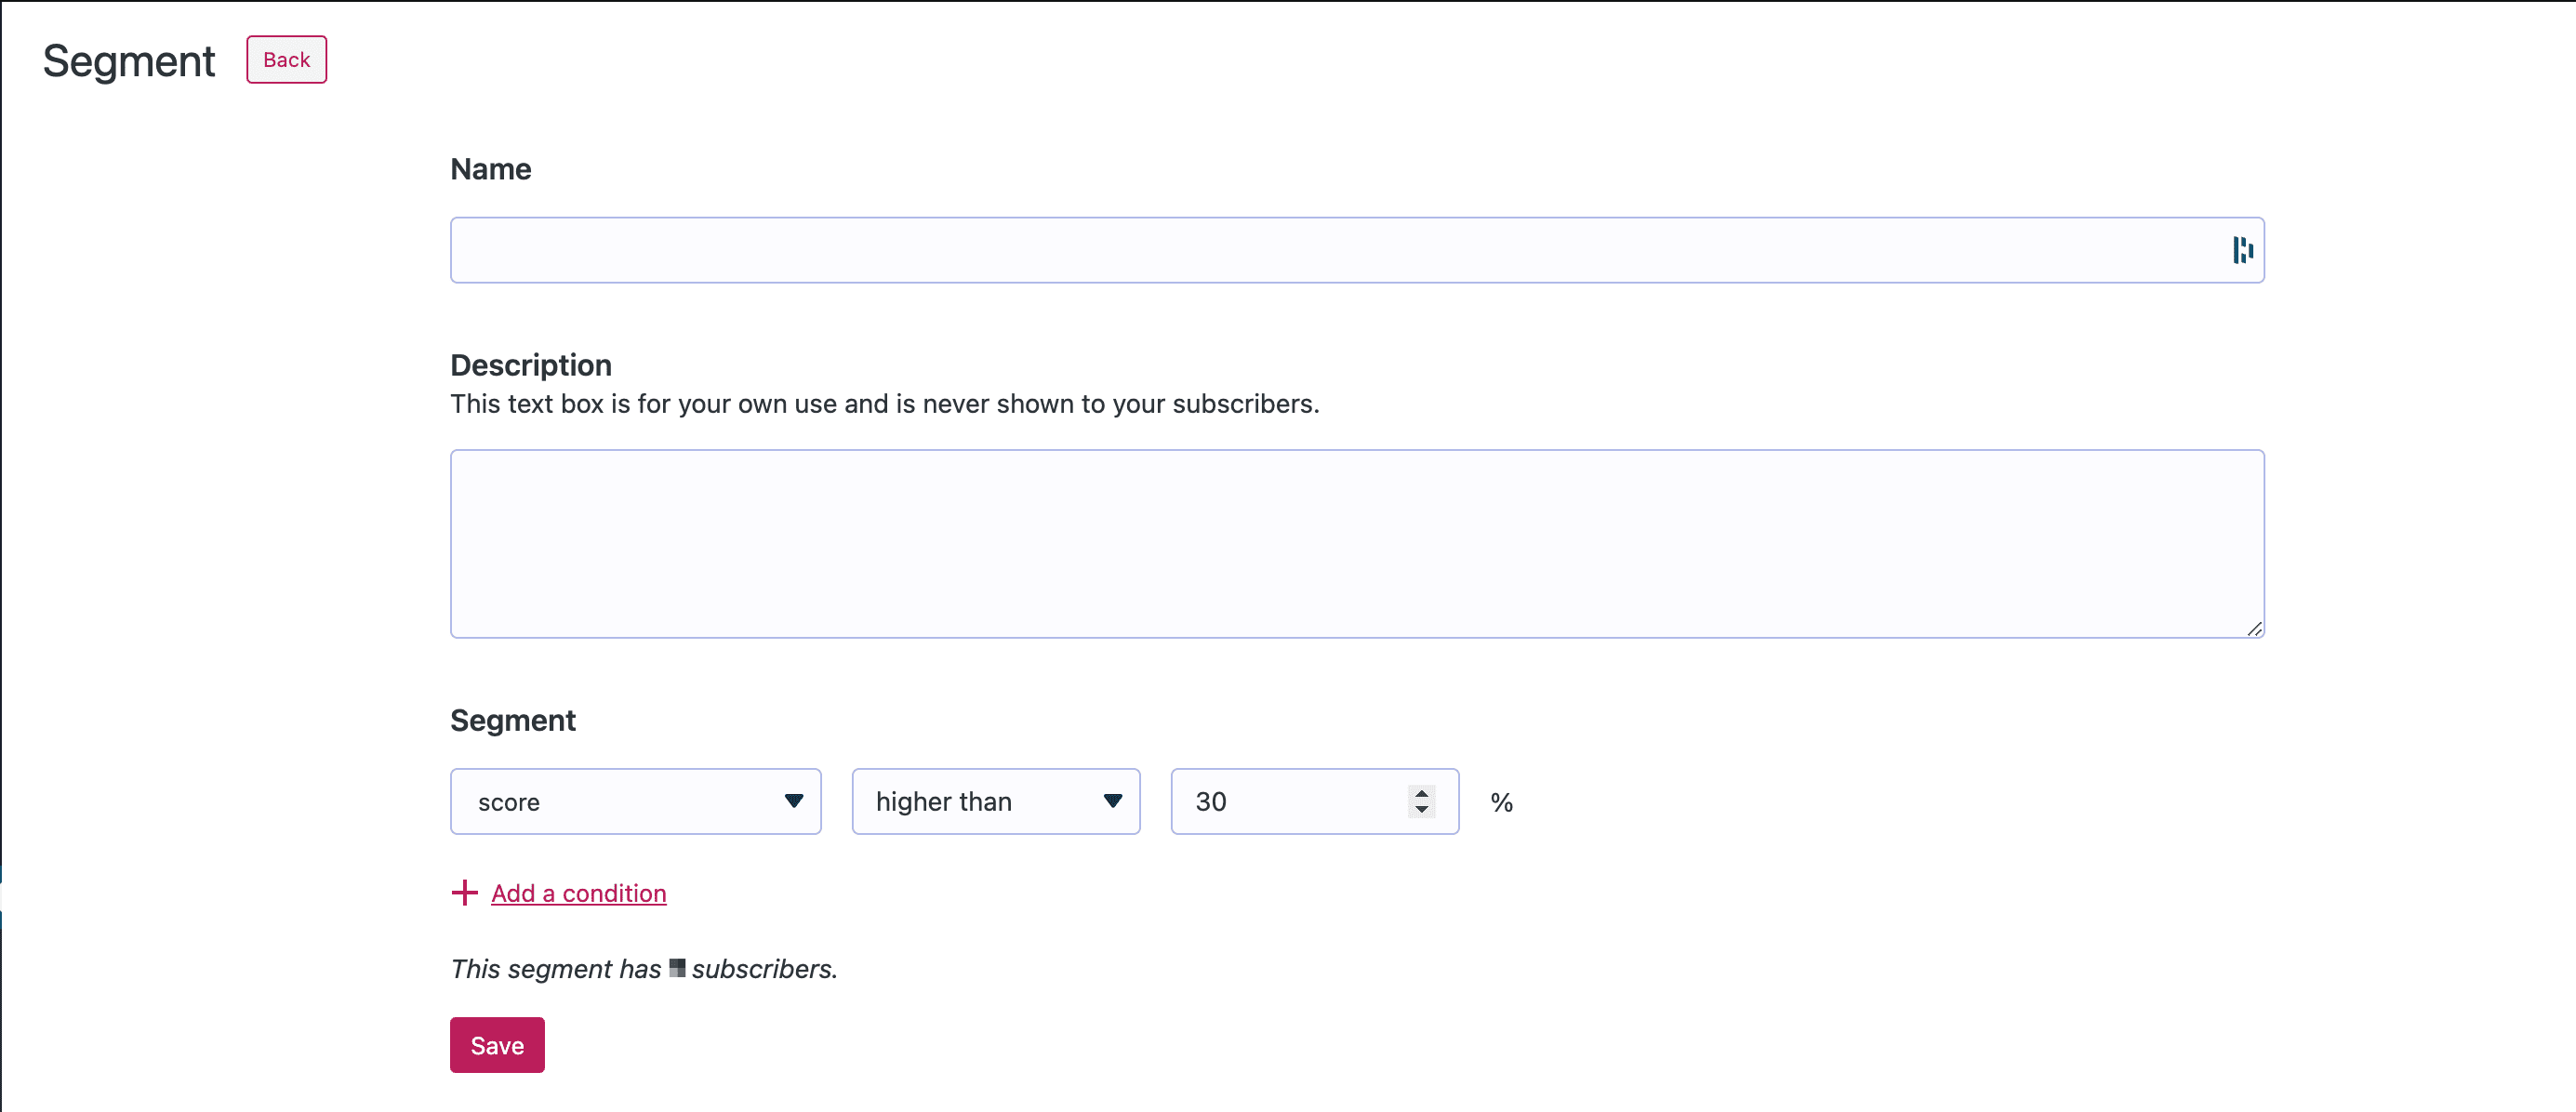
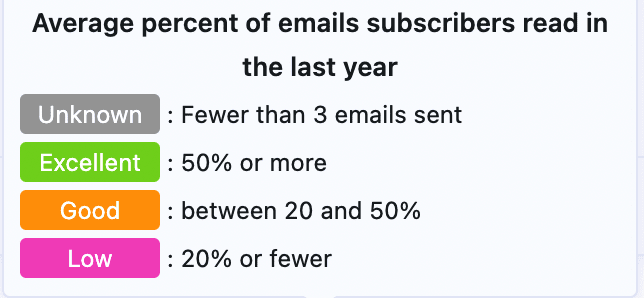
Creating segments for your subscribers who have a “good” or “excellent” score of 30% and above is a good way of ensuring that your emails will be delivered to subscribers who have been consistent in engaging with your emails in the past.
2. Isolating disengaged subscribers:
It’s also worth creating a segment for your less engaged subscribers and add them to a “Less Engaged” segment or something similar. You should move these subscribers from your main list to a separate one, so they won’t affect your deliverability. You can then contact them with a dedicated newsletter to win them back, send less frequently to this segment, or consider them Inactive.

Segment based on past purchases
You can create segments according to your customer’s purchase history and adjust the content of your email campaign accordingly. For subscribers who have only purchased once in the last 120 days, for example, include content that encourages them to buy again.

You can also combine conditions to create a very specific niche if you want to announce a sale:

More segment options based on past purchases and historical metrics:
- Top customers: customers who have spent over a certain amount of money over the past X days.
- Frequent customers: customers who have purchased a certain amount of times in the past number of months
- Never bought: subscribers who haven’t yet made a purchase.
Segment by geographic location
You can create location-based segments, and adjust your content according to multiple cultures, weather, and special dates for different countries.

Others
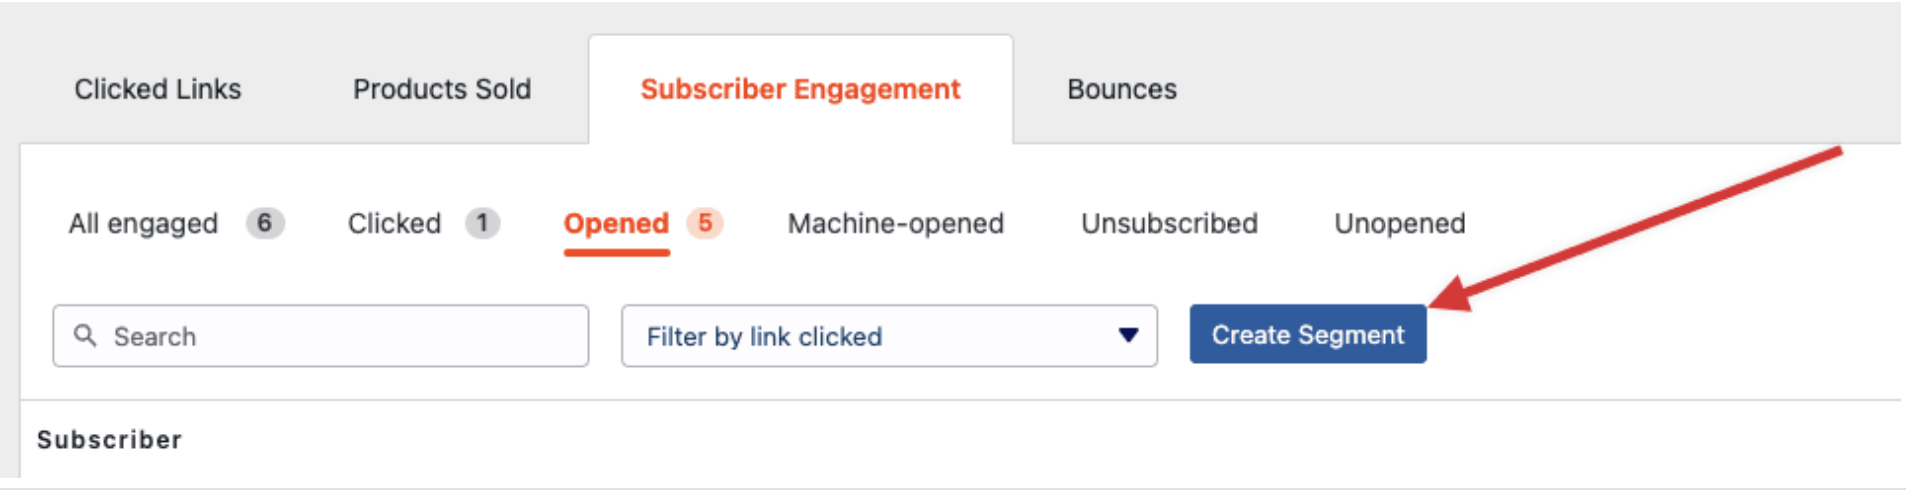
With the help of MailPoet’s reporting tools, you can analyze the performance of your marketing campaigns that provide valuable insight into the behavior of your customers. One of the most useful features is Detailed Statistics, which allows you to dig deeper and see how each of your subscribers interacted with your campaign.
A segment can be created under the “Subscriber Engagement” in an email’s Statistics (via Clicked, Opened and Unopened tabs):
You must be logged in to post a comment.