Tags are flexible labels you can attach to your subscribers to organize and categorize them beyond lists. Use tags to track how subscribers joined, what interests them, or any other grouping that helps you send more targeted emails. You can manage all your tags from a dedicated Tags page, assign them to subscribers individually or in bulk, and use them to build segments and trigger automations.
Quick Links
- Managing Your Tags
- Adding Tags to Subscribers
- Tagging Subscribers That Sign Up via a Form
- Tagging Subscribers on Import
- Using Tags in Automations
- Segmentation by Tag
Managing Your Tags
MailPoet includes a Tags management page where you can view, create, rename, and delete all your subscriber tags in one place.
Opening the Tags Page
To open the Tags page, go to MailPoet > Subscribers and click the Tags button in the page header.

Viewing Your Tags
The Tags page displays a table with the following information for each tag:
- Name — the tag name.
- Description — an optional note describing the tag’s purpose. A dash (—) is shown if no description has been added.
- Subscribers — the number of subscribers who have this tag. Click the number to jump to the Subscribers list filtered by that tag.
- Created — the date the tag was created.
You can sort the table by clicking the Name, Subscribers, or Created column headers. Use the search bar at the top to find tags by name or description.

Creating a Tag
- On the Tags page, click Add new tag.
- In the dialog that appears, enter a Name for your tag. This field is required.
- Optionally, enter a Description to help you remember what the tag is for.
- Click Create tag.
The new tag appears in the list and is immediately available for assigning to subscribers.

Note: Tag names must be unique. If a tag with the same name already exists, you will see an error message asking you to choose a different name.
Editing a Tag
- On the Tags page, find the tag you want to change.
- Click the edit icon on the tag’s row.
- Update the Name or Description in the dialog that appears.
- Click Save.
Deleting Tags
Deleting a tag permanently removes it. The tag is also removed from every subscriber it was assigned to. The subscribers themselves are not deleted.
To delete a single tag:
- On the Tags page, click the actions menu (⋯) on the tag’s row.
- Select Delete.
- Confirm the deletion in the dialog that appears.
To delete multiple tags at once:
- Select the checkboxes next to the tags you want to remove.
- Click Delete in the bulk actions toolbar.
- Confirm the deletion in the dialog.

Adding Tags to Subscribers
1. Individually
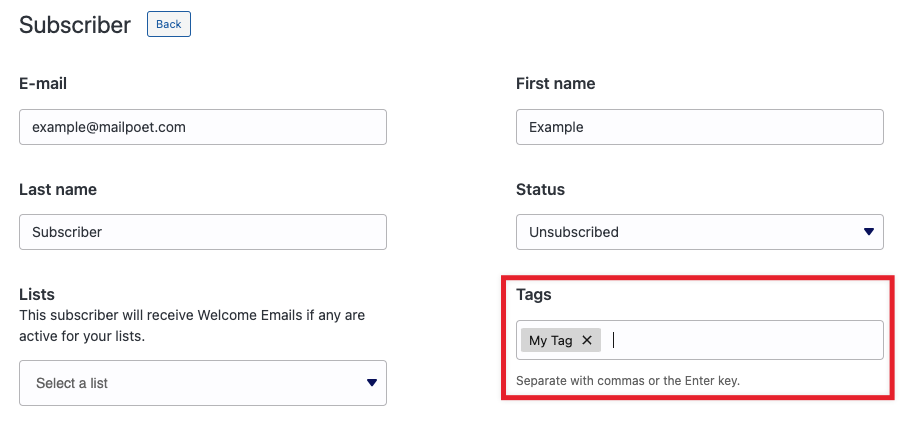
When editing a subscriber or creating a new subscriber, a Tag field is available in their profile.
To add a new tag, type a name and then press Enter or type a comma. The text will convert into a tag:
You can continue adding tags by pressing Enter or typing a comma between each one.
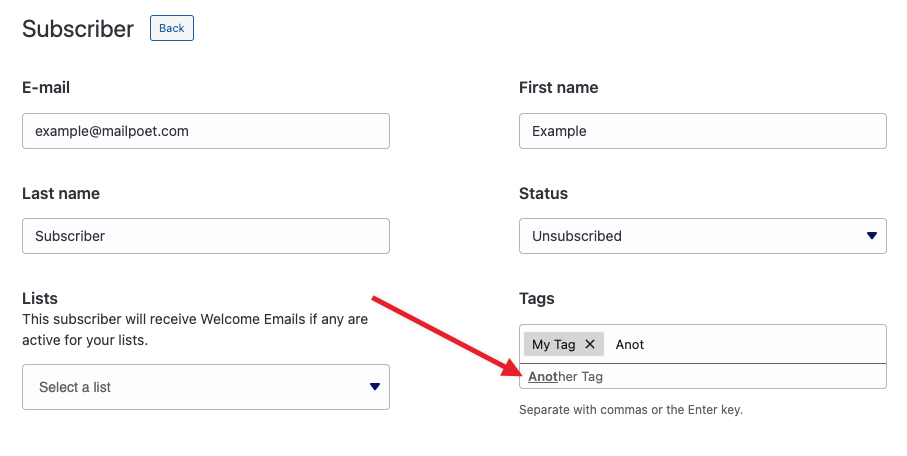
For existing tags, when you start typing the tag name, it will appear below the field for you to select:
Once you have added all your tags, click Save on the subscriber profile. The tags will be displayed in the Subscribers list. A tag filter is also available so you can filter your subscriber list by tag:

2. In Bulk
To add or remove tags for multiple subscribers at once, select the subscribers using the checkboxes, and you will see Add tag and Remove tag options in the bulk actions:
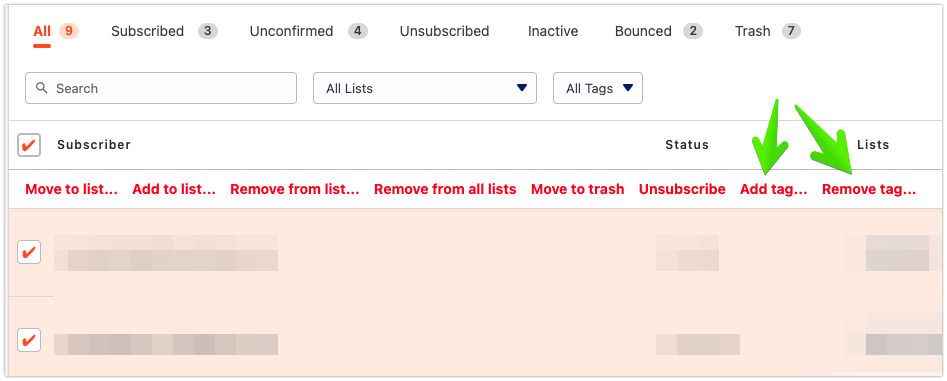
You can also select all subscribers from all lists, or all subscribers from a specific list, to make changes to them.
Tagging Subscribers That Sign Up via a Form
When configuring your subscription forms, you can set one or more tags to automatically assign to subscribers who sign up through that form. In the form editor sidebar, you will find a Tags panel under the Form tab:

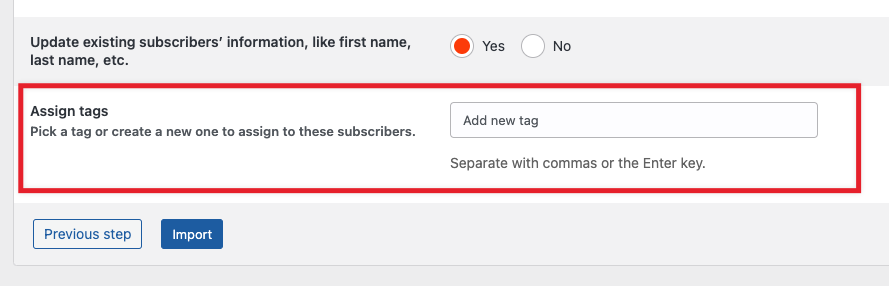
Tagging Subscribers on Import
When importing subscribers from a CSV file, you will see an option to add tags to the imported subscribers. This is useful for keeping track of batches of subscribers that were all imported together.
Using Tags in Automations
Tags work with MailPoet Automations in two ways:
As triggers: You can start an automation when a tag is added to or removed from a subscriber. Use the Tag added to subscriber or Tag removed from subscriber triggers.
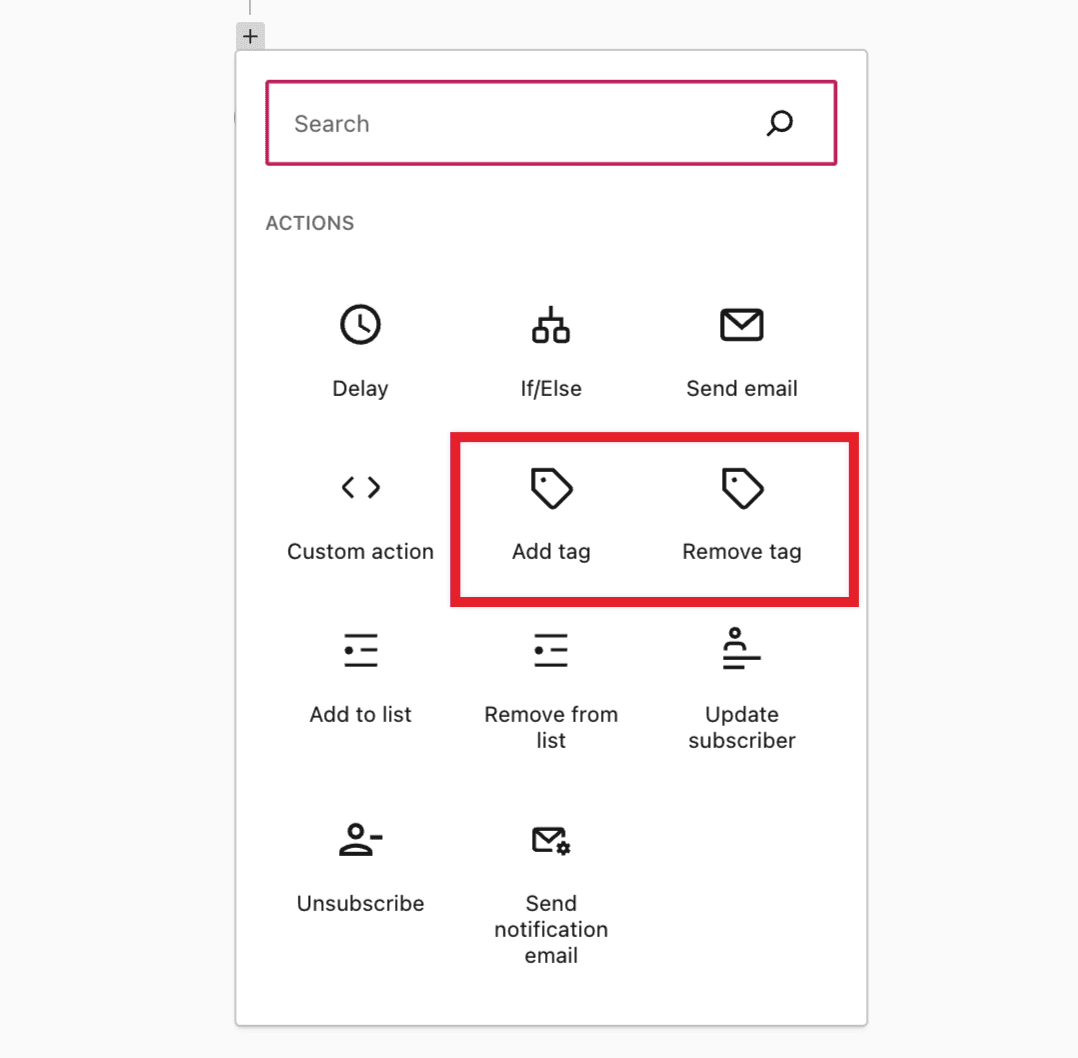
As actions: You can automatically add or remove tags during an automation. The Add tag and Remove tag actions let you classify subscribers based on their behavior or journey through your automations.
For example, you could set up an automation that adds a “Completed onboarding” tag when a subscriber finishes a welcome email series, and then use that tag to include them in a segment for your regular newsletter.
Segmentation by Tag
After adding tags to your subscribers, you can create segments targeting those tags. See the full Guide to Subscriber Segmentation for details.
This allows you to build segments of subscribers who have certain tags, do not have certain tags, or match combinations of different conditions:

You must be logged in to post a comment.