When creating an Automation, choosing an action is the second step. The first step is choosing a trigger that will determine when the action will occur. From sending an email to adding a tag to subscribers, you can choose from different types of actions and you can add one or multiple actions to the same Automation. A description of each action can be found below.
Delay
This action allows you to set a timeframe between a trigger and another action. It can also be placed in between two actions if your automation is composed of a series of actions.
For instance, if you want to send an email asking your customers to review your product but want to give them some time to test the product, you can add the Delay action between an Order Status Changed trigger and the Send email action with the period of time you think it’s enough for them to use the product.
The time can be set in minutes, hours, days, or weeks, and this option can be found in the actions settings:

Note that adding a delay between a trigger and a Send Email action may determine whether the email will be considered transactional or marketing email, which may affect what subscribers receive it. You can read more about this here.
If/Else
This action can be used if you want to do different actions depending on the user’s behavior or on a customer’s order detail, for instance.
Let’s say you want to send an email when a customer places their first order on your website, but if it’s not the first order, you’d like to add a tag to the customer instead (e.g., Recurring Customer). With an If/Else action, you can achieve that. It would look like this:

As you can see, you can select different conditions for this action on the right sidebar. It gives you a lot of power and it’s a great action for designing automations to engage your customers.
Send email
With this action, you can send emails to your customers and subscribers for different purposes — to give more details about their orders, recover an item they left in the cart, or keep them engaged. It’s a great tool for driving sales or keeping close to your customers.
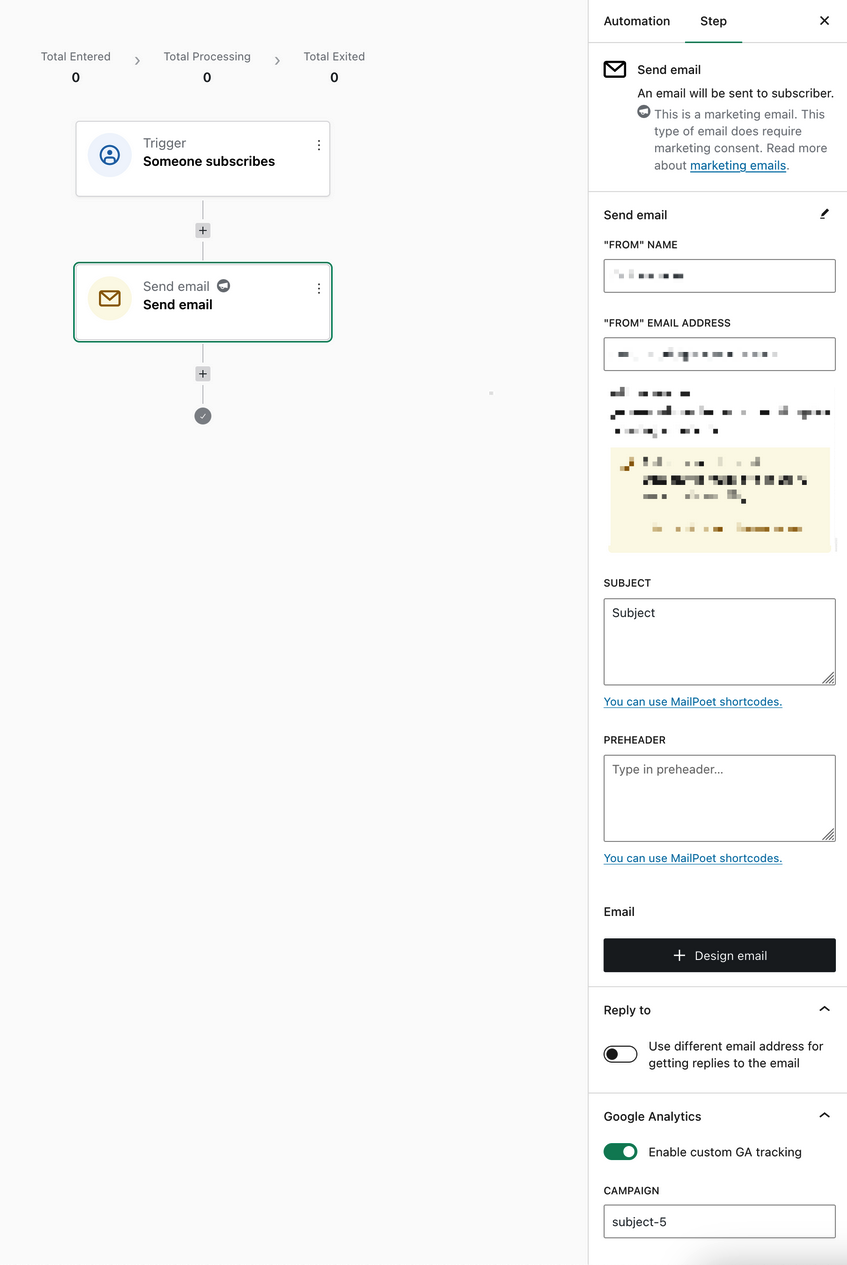
In the actions settings, you can quickly edit a few aspects of the email, such as the subject, preheader, “from” address, and you can also click Design email to open the email editor and create your email content. You can also create an email from a template, just like you do via MailPoet > Emails menu.
Send latest newsletter
This action automatically sends the most recently sent regular newsletter from the trigger list to the subscriber who triggered the automation. It is useful as a “welcome” step — when a new subscriber joins a list, they automatically receive the latest newsletter so they do not miss your most recent content.
[Screenshot: Send latest newsletter action in the automation editor]
How it works:
- MailPoet automatically selects the latest sent standard newsletter that was sent to the list associated with the trigger. No configuration is needed.
- The action requires a trigger that provides a list context, such as “Someone subscribes”. If your automation does not have a trigger with a list context, this action will be disabled in the action picker.
- Subscribers who already received the newsletter (from the original send or a previous automation run) will not receive it again. MailPoet prevents duplicate sends automatically.
- If the subscriber has an “Unconfirmed” status (waiting for signup confirmation), the action waits for them to confirm. If they confirm within the retry window, the newsletter is sent. If they do not confirm in time, the action is skipped.
- If no newsletter has been sent to the trigger list yet, the action is skipped.
Add tag
This action adds tags to your subscribers. You can use it to better classify your subscribers and quickly differentiate them when looking at your lists or to create segments based on their tags, for instance.
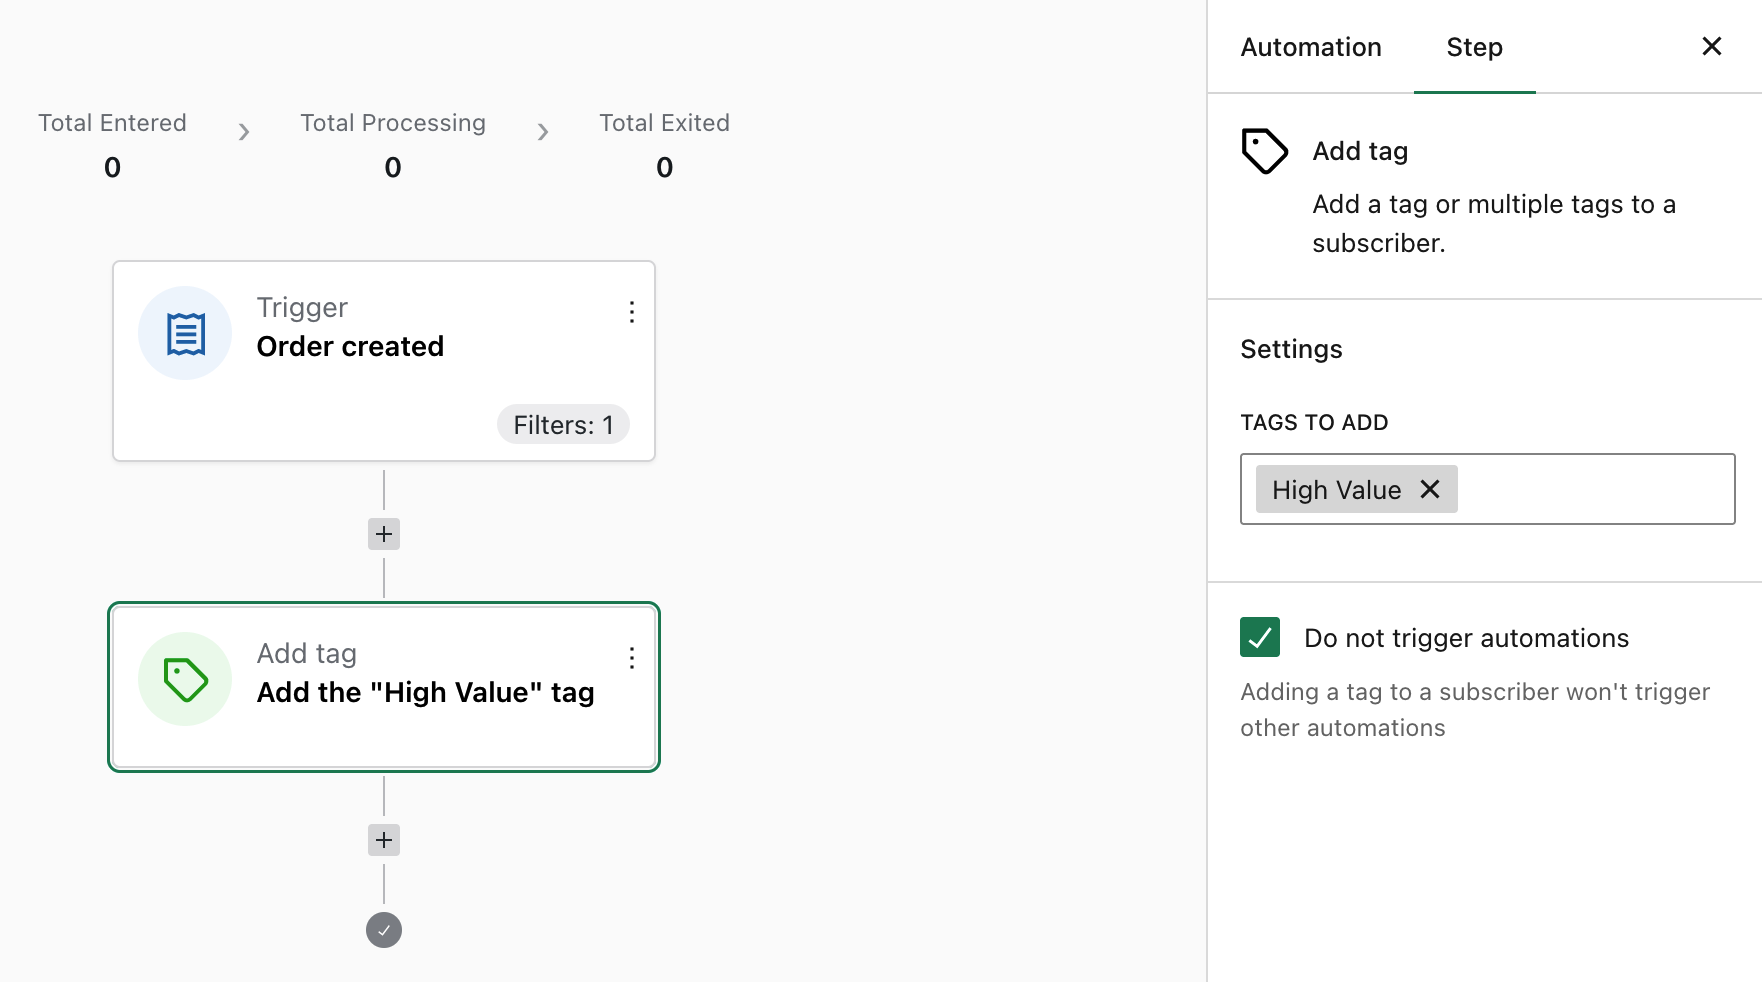
In the action settings, you can choose not to trigger another automation when a tag is added by this automation. This may be useful if you have another automation set up to send an email after the Tag added to subscriber trigger.
Remove tag
This action removes tags from your subscribers. It can be used for the same purposes described in the Add tag action above.
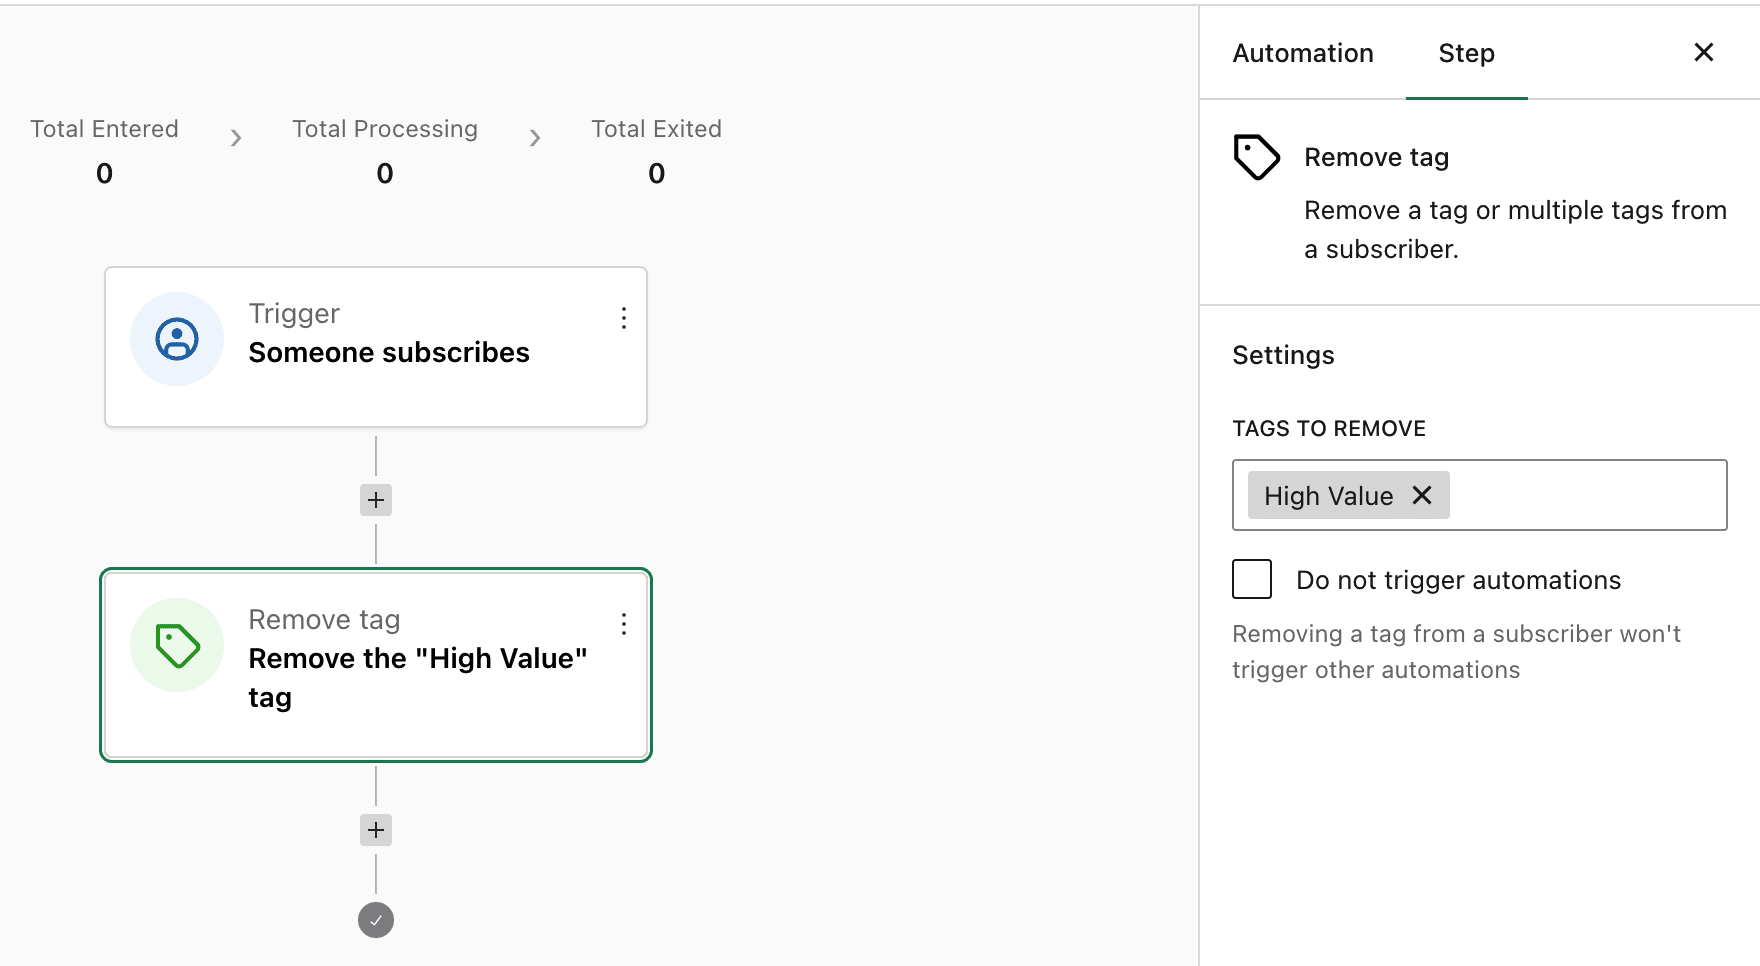
In the action settings, you can choose not to trigger another automation when a tag is removed by this automation. This may be useful if you have another automation set up to send an email after the Tag removed from subscriber trigger.
Add to list
If you have different subscriber lists and need to add subscribers to specific lists based on some parameters, this action will suit you well. For instance, let’s say you sell different subscription products (e.g. courses) and you want to send newsletters related to the course the customer subscribed to. You could set up an automation that looks like this:
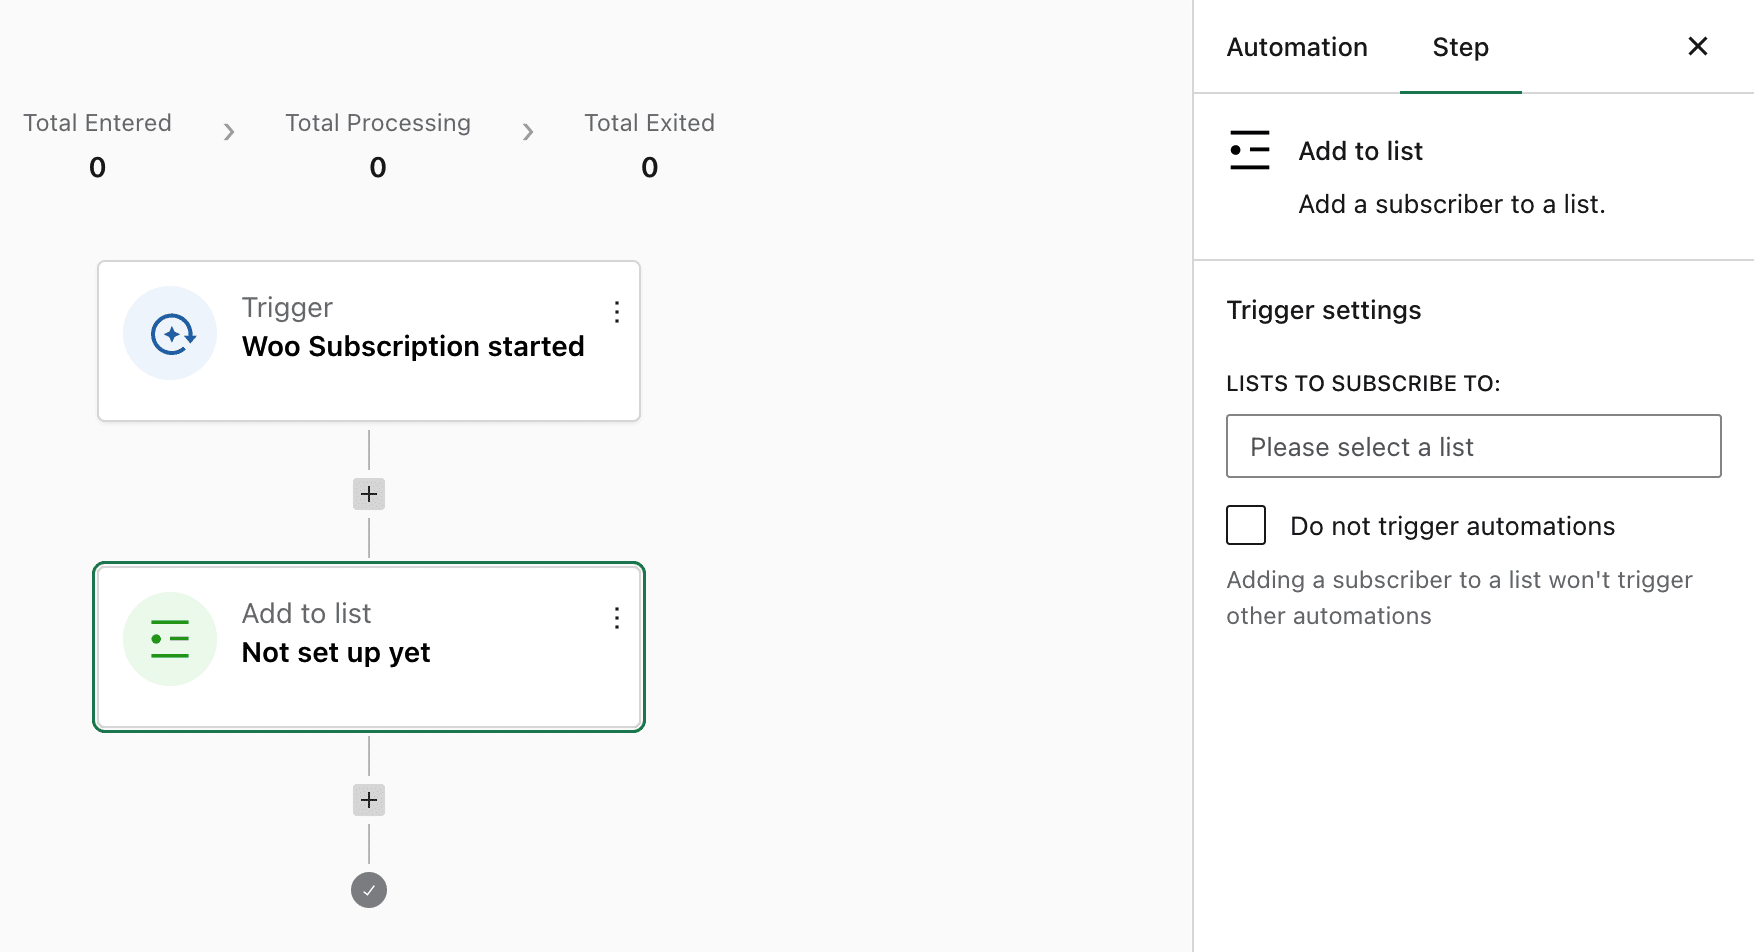
In the action settings, you can select the list they will be added to. You can also choose not to trigger another automation when a subscriber is added to a list by this automation. This may be useful if you have another active automation to run when someone subscribes to a list.
Remove from list
This action can be useful if you have different subscriber lists and need to remove subscribers from specific lists based on some parameters. For instance, continuing the example of the Add to list action (above), let’s say you want to stop sending emails to customers who canceled a subscription. You could set up an automation that looks like this:
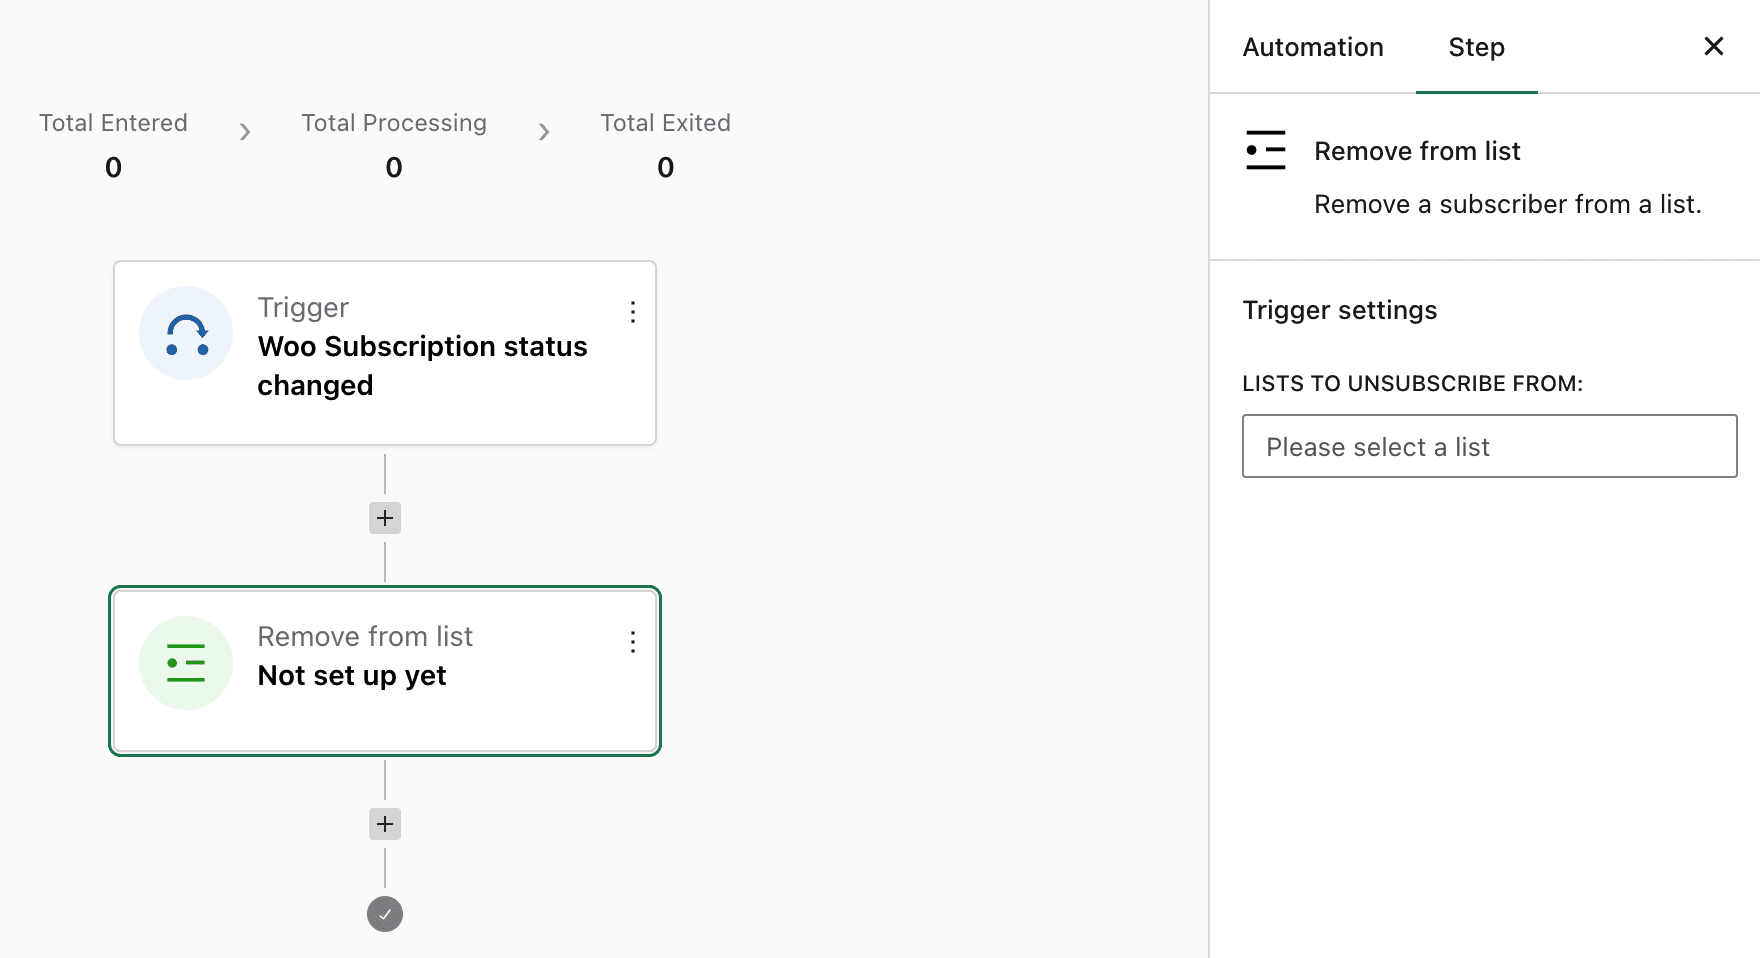
In the action settings, you can select the list from which they will be removed.
Update Subscriber

In the action settings, you can select the custom field you want to update.
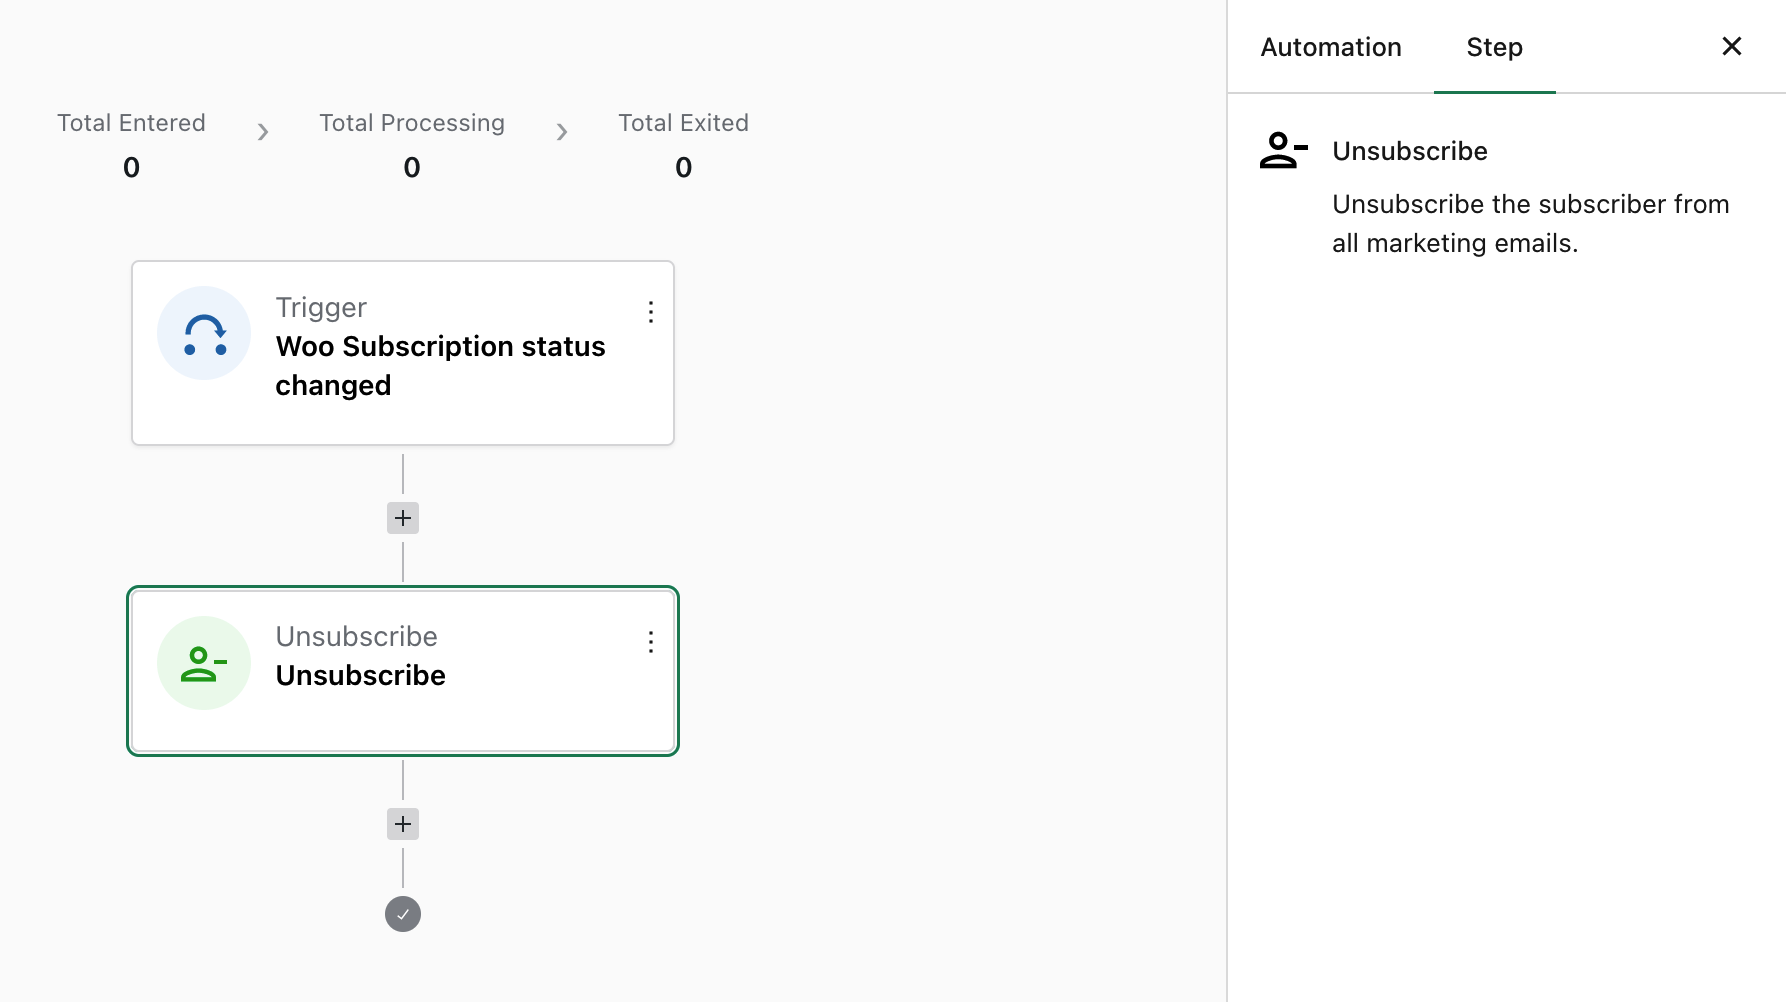
Unsubscribe
This action allows you to unsubscribe contacts from all marketing emails at once. Let’s say you offer a membership subscription and you send emails related to the membership your contacts are subscribed to, but you want to subscribe them from all lists if their subscription expires or gets canceled. You could create an automation that looks like this:
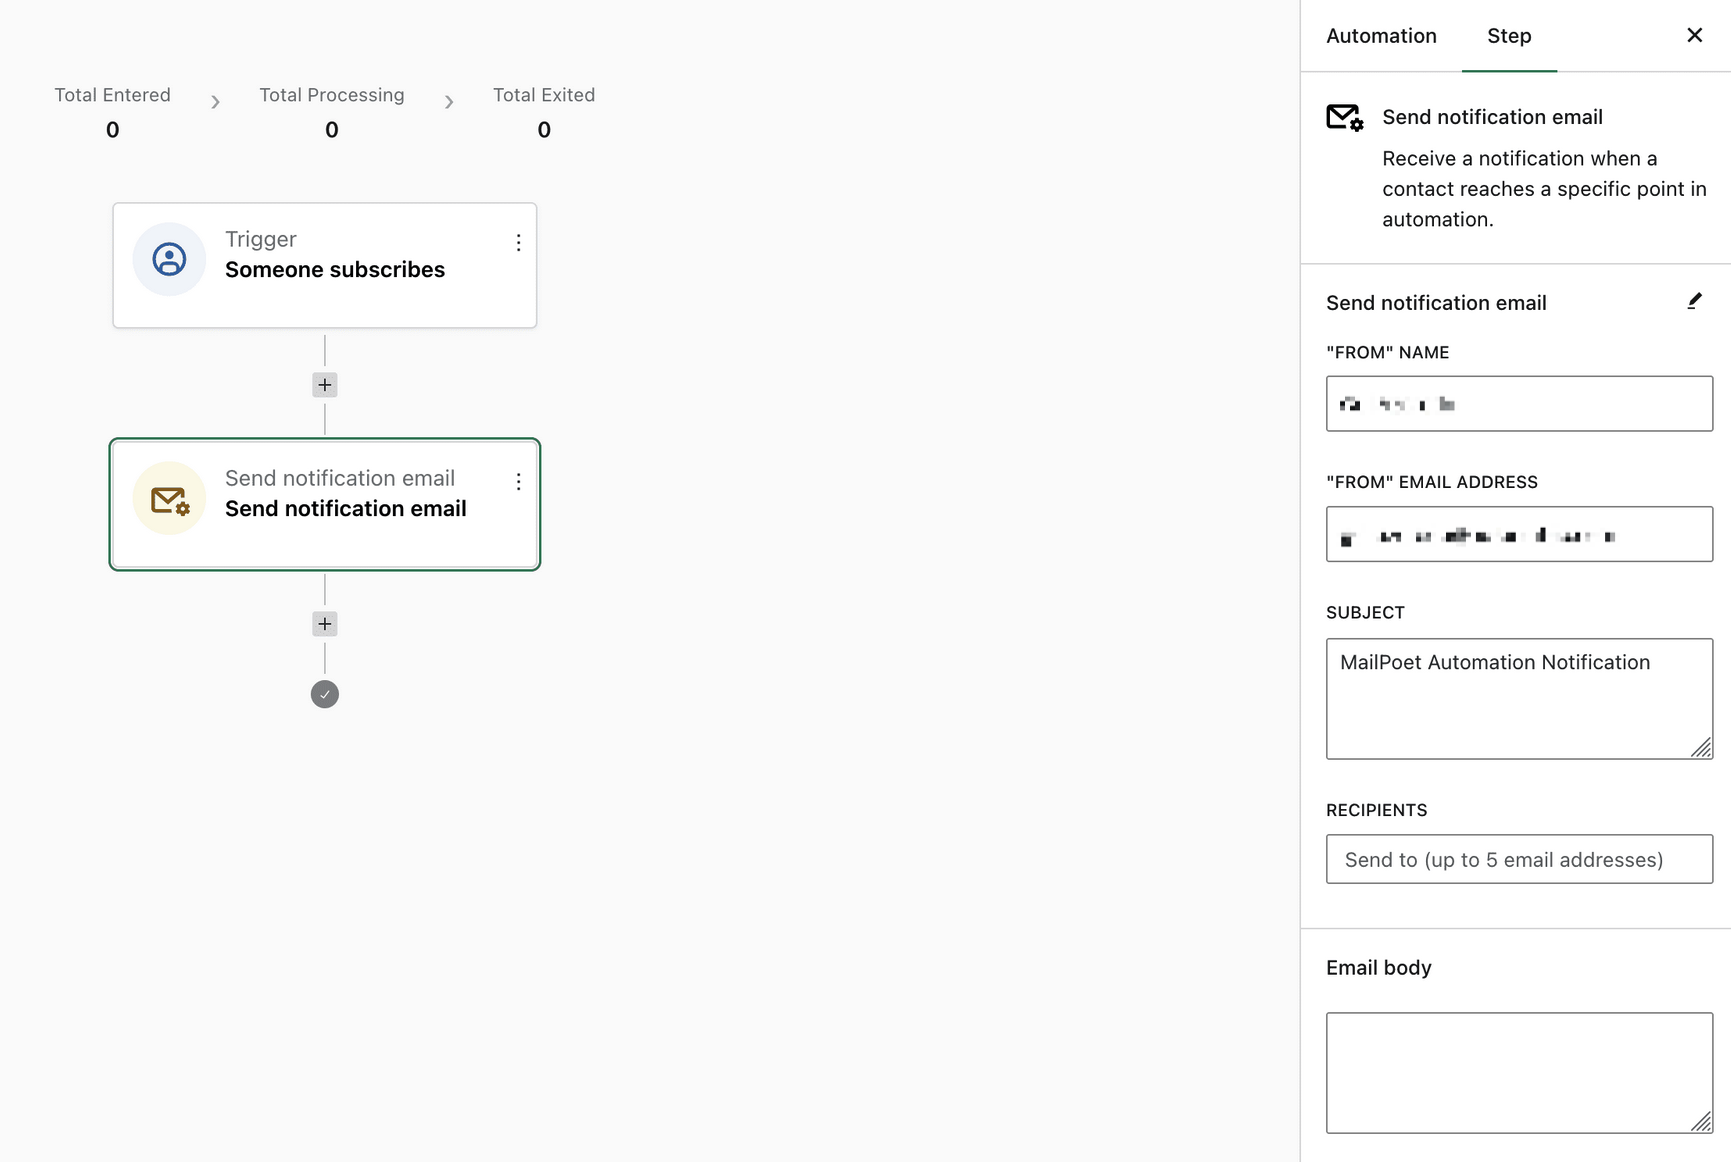
Send Email Notification
This action can be useful if you need to notify admins when some event occurs on your website, You can send a notification email to up to five different email addresses when the automation is triggered. You can also set the “From” Name, “From” Email Address, Subject, and Email Body.
Change User Role
(Requires paid MailPoet plan and MailPoet Premium plugin)
This action changes a WordPress user’s role. In the action settings, you can select the target role from a dropdown. The dropdown lists only non-elevated, editable roles. Administrator and other elevated custom roles cannot be selected for security reasons.
This action requires a trigger that provides a WordPress user context, such as “WordPress User Registers” or “WordPress User Role Changed”.
Change Order Status
(Requires paid MailPoet plan, MailPoet Premium plugin, and WooCommerce)
This action changes a WooCommerce order’s status. In the action settings, you can select the target status from a dropdown listing all available WooCommerce order statuses.
This action requires a trigger that provides an order context, such as “Order Status Change”, “Order Created”, or “Order Paid”.
Add Order Note
(Requires paid MailPoet plan, MailPoet Premium plugin, and WooCommerce)
This action adds a note to a WooCommerce order. In the action settings, you can enter the note text and choose the note type:
- Private note — visible only to store admins in the WooCommerce order screen.
- Note to customer — triggers WooCommerce’s built-in customer-note email, notifying the customer about the note.
This action requires a trigger that provides an order context.
Change Subscription Status
(Requires paid MailPoet plan, MailPoet Premium plugin, and WooCommerce Subscriptions)
This action changes a WooCommerce Subscription’s status. In the action settings, you can select the target subscription status from a dropdown. This is useful for automating responses to lifecycle events such as payment failures or trial expirations.
This action requires a trigger that provides a subscription context, such as “Woo Subscriptions Status Changed” or “Woo Subscription Payment Failed”.
Add Product to Subscription
(Requires paid MailPoet plan, MailPoet Premium plugin, and WooCommerce Subscriptions)
This action adds a product to an existing WooCommerce Subscription. In the action settings, you can select the product, set the quantity, and optionally set a line total. This is useful for customer rewards, upsells, or adding bonus items to a subscription.
This action requires a trigger that provides a subscription context.
Remove Product from Subscription
(Requires paid MailPoet plan, MailPoet Premium plugin, and WooCommerce Subscriptions)
This action removes a product from an existing WooCommerce Subscription. In the action settings, you can select which product to remove. This is useful for downgrades, end-of-promotion removals, or cleaning up subscription line items.
This action requires a trigger that provides a subscription context.
Update Product on Subscription
(Requires paid MailPoet plan, MailPoet Premium plugin, and WooCommerce Subscriptions)
This action updates an existing product on a WooCommerce Subscription. In the action settings, you can change the quantity, line total, or replace the product entirely with a different product. This is useful for plan upgrades, downgrades, or seasonal product swaps.
This action requires a trigger that provides a subscription context.
Custom Action
Enables developers to create a customized action that responds to specific hooks in WordPress. More details about this trigger can be found here.