A drip campaign is a series of pre-scheduled, automated emails sent to subscribers over a specific period.
You can create campaigns for educating users with a welcome or onboarding program, a training course, or a promotional campaign rewarding your best customers by sending freebies and coupons. It’s a great resource to keep your subscribers engaged and nurture leads.
You can choose a trigger to define what event will make a subscriber/customer join your drip campaign. Typically, the following triggers are used for drip campaigns:
- WordPress User Registers
- Someone Subscribes
As you will use the Delay action to define the interval between emails it’s important to consider that only contacts with Subscribed status will receive the emails as explained here.
Setting Up a Drip Campaign
The first step is to navigate to MailPoet > Automations and click +New Automation, followed by Create Custom Automation.
Now you should be seeing the Edit Automation page where the first step is to add a trigger. In this example, we’ll use the Someone Subscribes trigger:
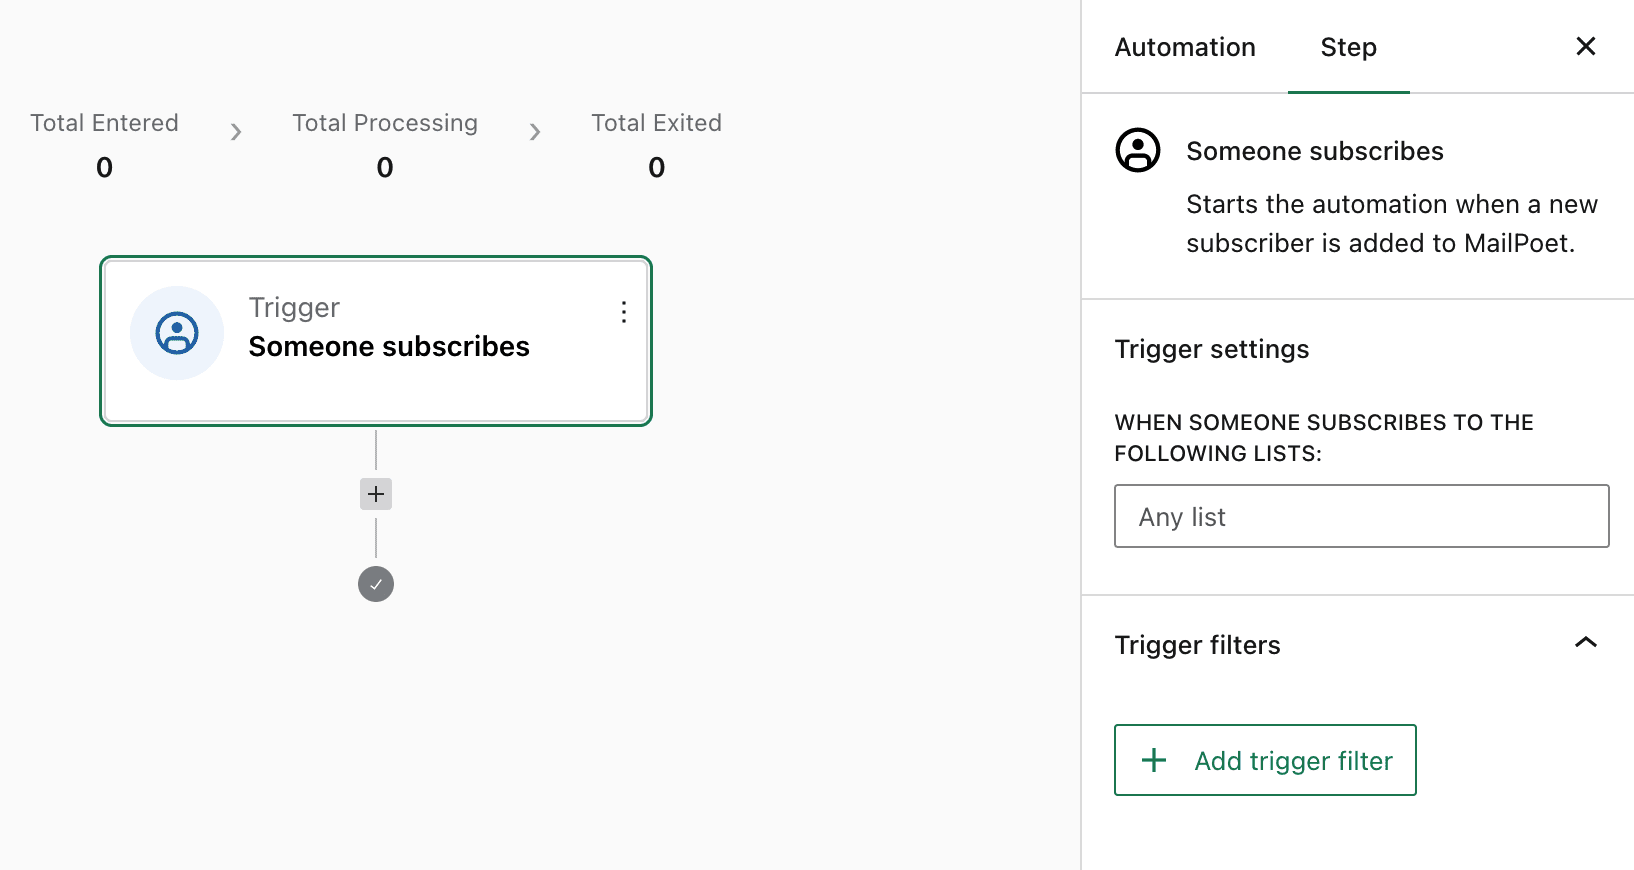
The trigger settings on the right sidebar allow you to set a specific list(s). In this case, only subscribers who opt-in to those specific lists would enter the automation and receive the drip campaign emails.
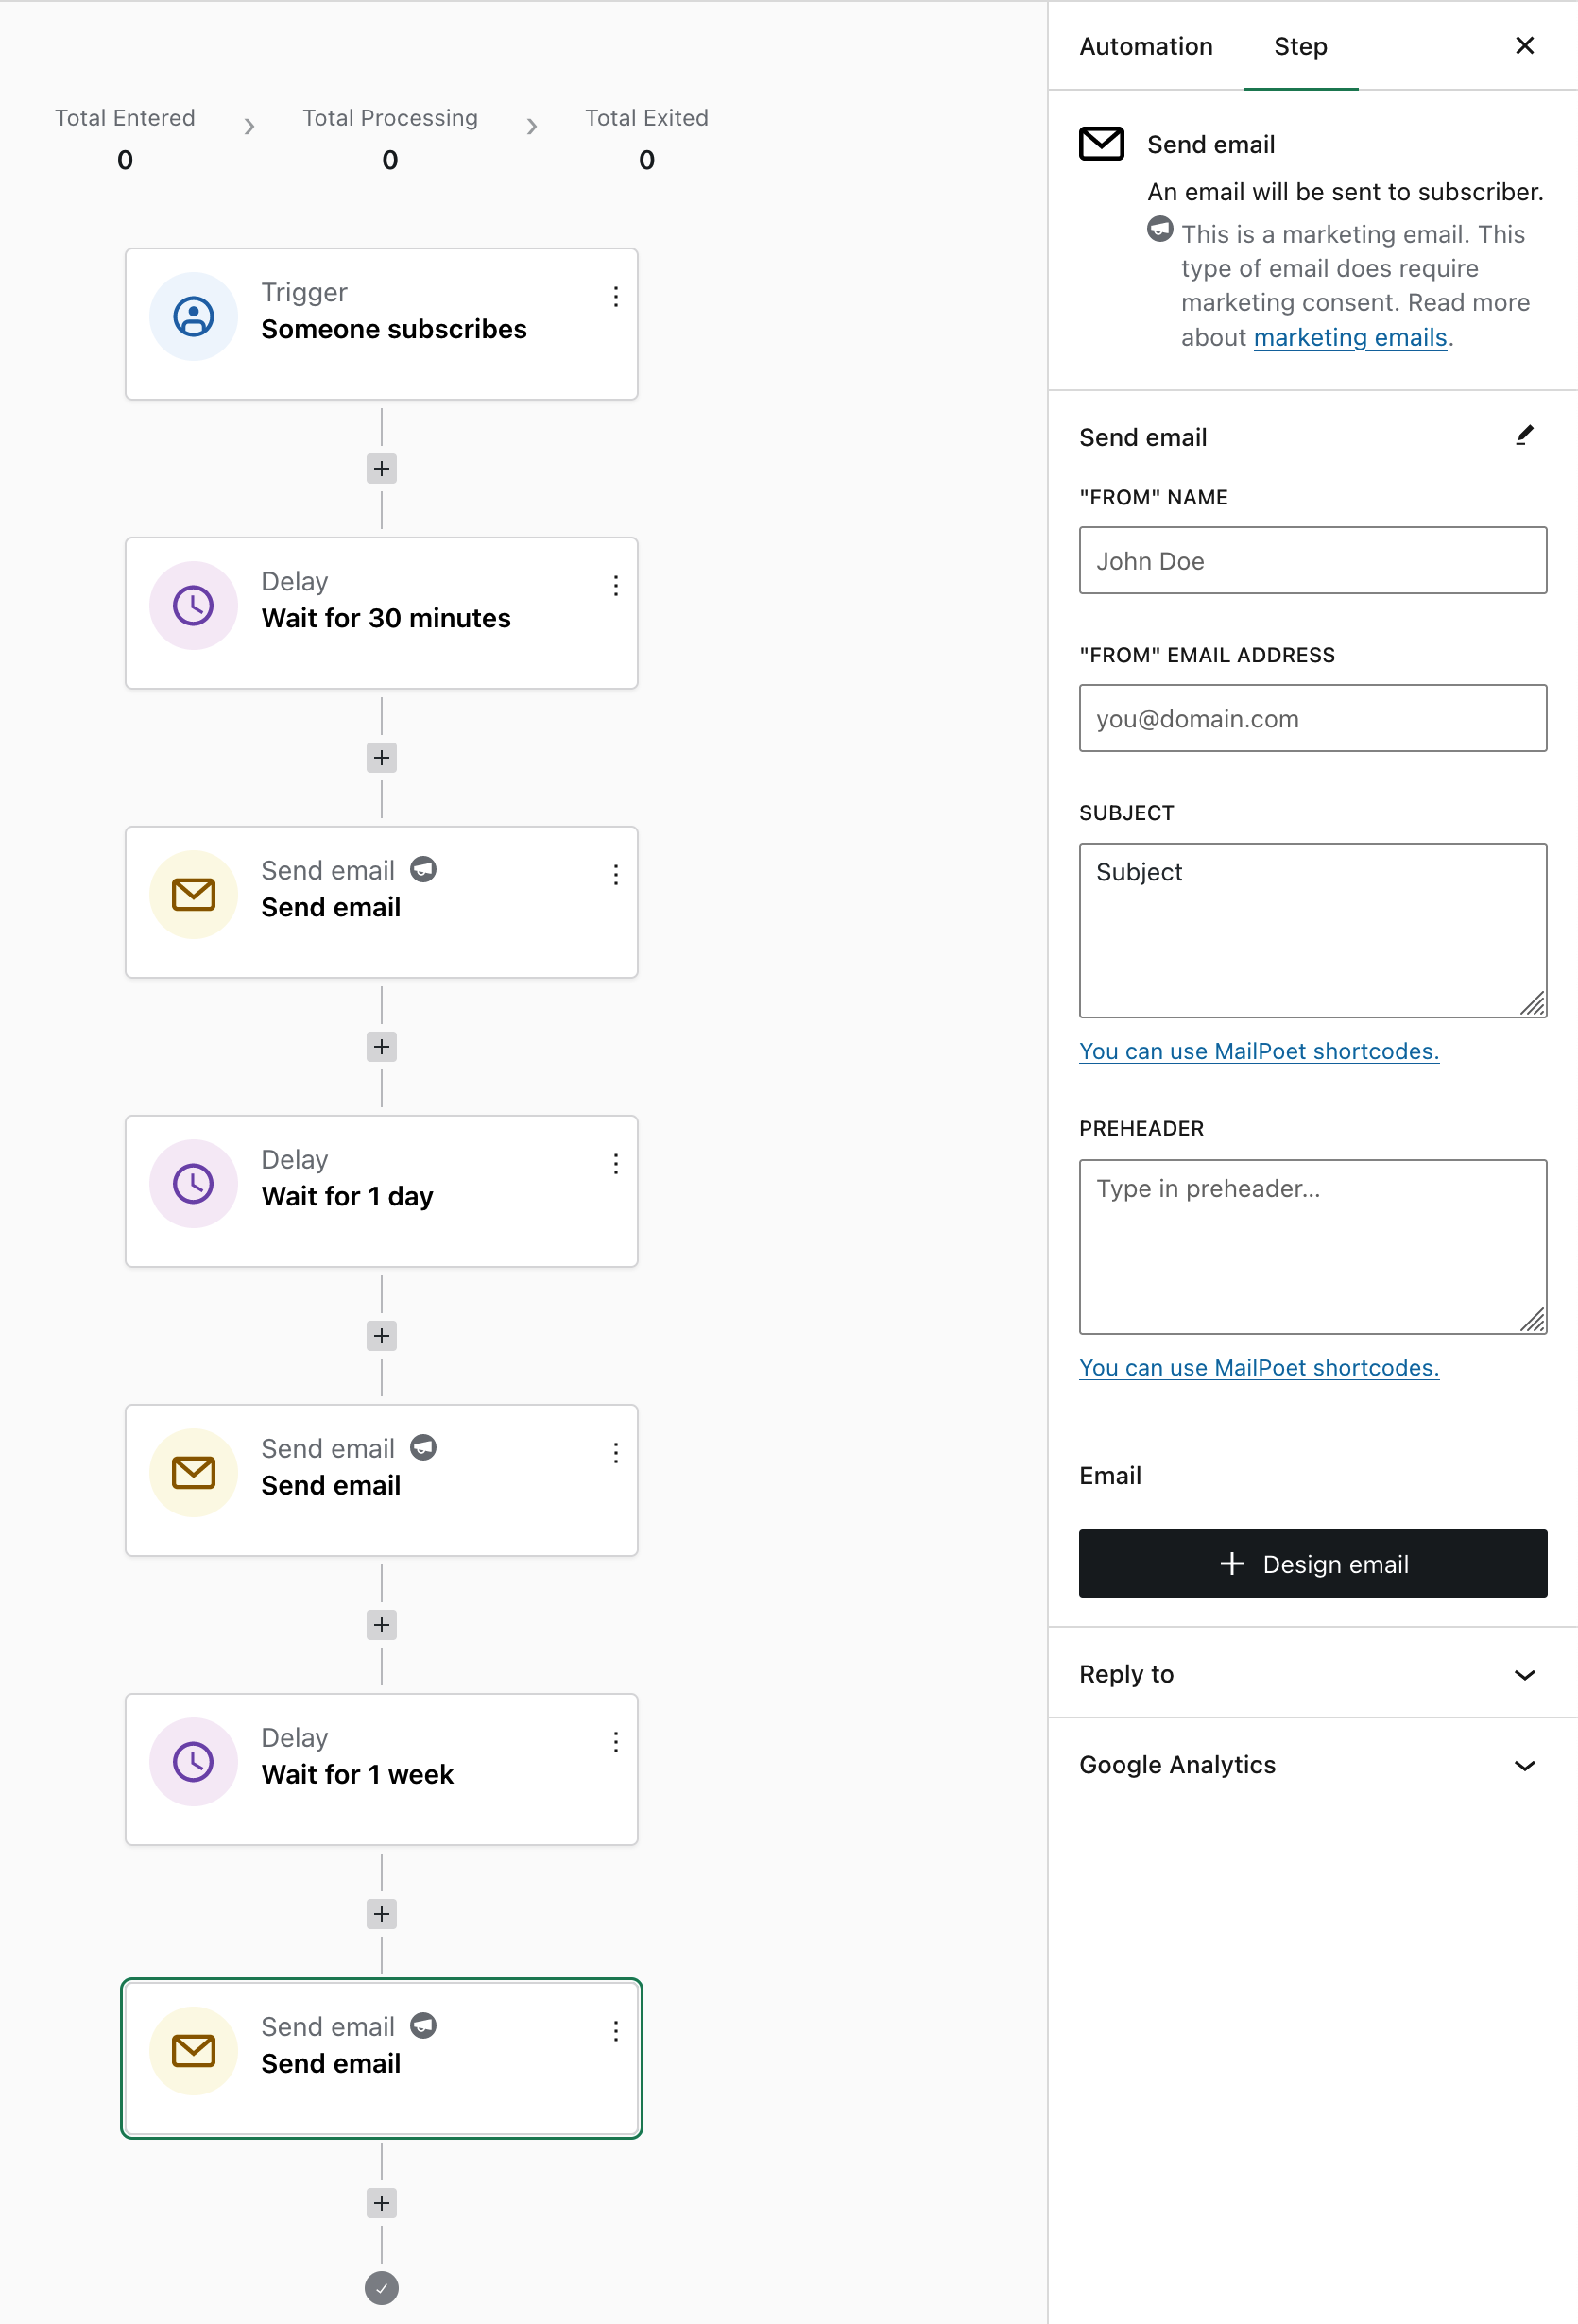
Then, you can add a Send Email action or a Delay action if you want to give an interval before the subscriber receives the first email. In this example, I added a 30 minutes delay:

If you click the Send Email actions, you will see the settings on the right sidebar where you can quickly edit a few aspects of the email, such as the subject, preheader, “from” address, and you can also click Design email to open the email editor and create your email content. You can also create an email from a template, just like you do via MailPoet > Emails menu. You can learn how to use our email editor here.
With the first email in your Drip campaign complete, you would repeat the steps above for each of the following emails you want to go out in your campaign. You can add as many Send Email actions as you want with the Delay action preceding it to determine the timeframe in which the email should be sent. Get creative!