What is the Newsletter Task Scheduler?
MailPoet sends emails in batches, and not all of them immediately. They are added to a sending queue, and the newsletter task scheduler is responsible for ensuring that all the batches of emails in the queue get sent one after the other. It also ensures all the other background scheduled tasks to update and sync data in the plugin are running as expected.
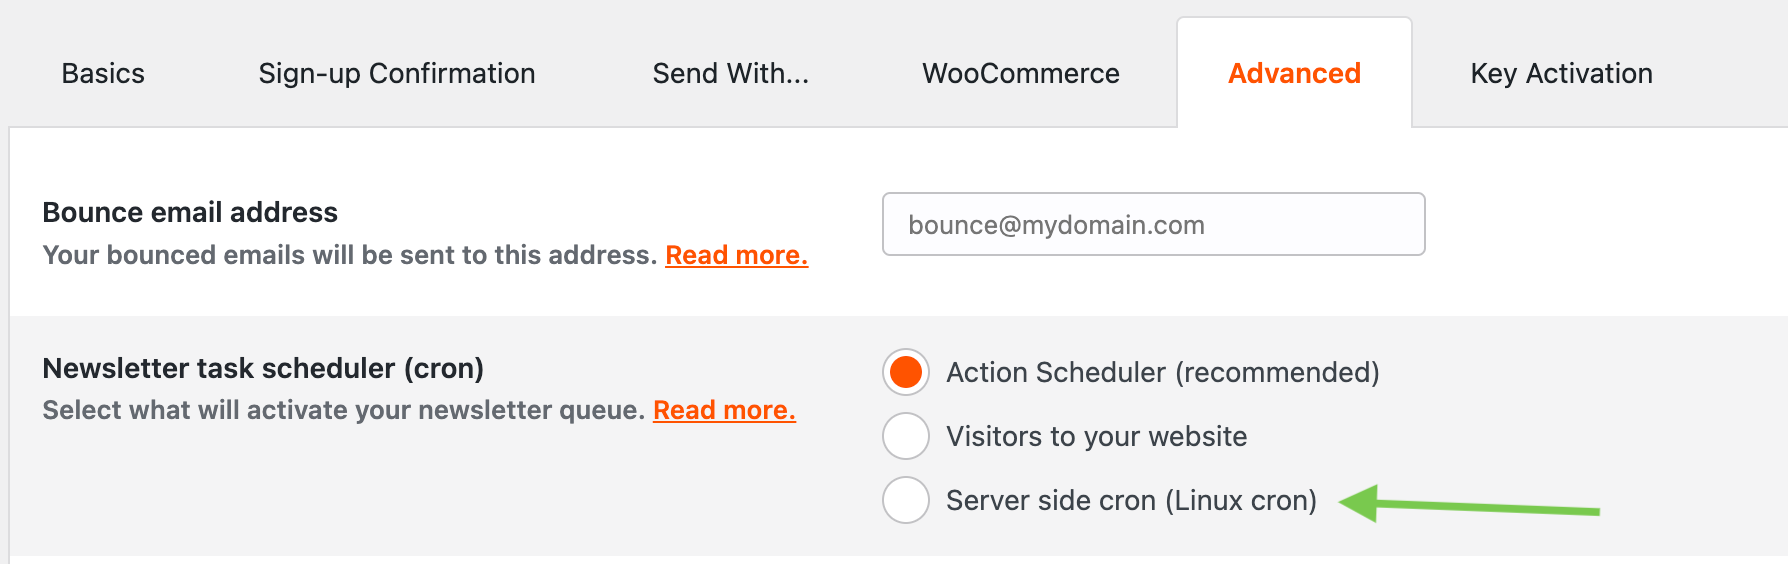
To work properly, the newsletter task scheduler must be triggered by an event to run continuously. You can access it by going to the MailPoet > Settings > Advanced tab.
If the task scheduler connection is not working and your emails are not being sent as expected, please follow these instructions to troubleshoot the issue.
Quick Links
Task scheduler options
We offer three options for you to select:

Action Scheduler (recommended)
A scalable, traceable job queue for background processing large queues of tasks in WordPress.
There is a trigger action ( mailpoet/cron/daemon-trigger) that every time the Action Scheduler runs, it checks whether there are jobs to process.
The Action Scheduler will be triggered by visitors or page loads in the WordPress admin.
Visitors to your website
Every visit (page load) to your website starts the task scheduler that temporarily runs in the background until all emails are processed.
Server side cron (Linux cron)
A server-side script that runs frequently to trigger any task of your choice.
Using the Linux Cron option is mostly recommended if:
- your website does not receive much traffic (e.g., 10 or fewer visitors per hour), and you need your emails to be sent exactly when scheduled;
- you have issues with high CPU usage on your server (it’s common if you’re hosted with Siteground). Although MailPoet is not CPU intensive, some hosts will dislike its long CPU cycles and have your website temporarily disabled. Switching to the Linux cron option can help relieve CPU usage issues and other server resource/load issues;
- you have any other form of sending issues (e.g., your site is behind a firewall);
- your cron link is being redirected to your homepage.
To set this up:
1. Go to your wp-admin > MailPoet > Settings. Click the “Advanced” tab.
2. Toggle the server-side cron (Linux cron option).
3. With that enabled, you’ll see a new box which is the cron job you need to set on your server. That’ll look like this;

Note that while we recommend a frequency of every minute, you can use the frequency box to set up other schedules and timings if preferred.
Now you have the cron URL you need to set it’s time to set it up on your host.
There are a few ways to set up a cron, and this depends both on your level of experience and the type of hosting you have.
Method 1: Using cPanel
This is the most common method of setting a cron job and involves setting the cron job directly within the control panel of your hosting. Most hosts use “cPanel.” Including popular hosts such as Siteground and Bluehost.
There are detailed guides from a number of hosts, including;
- Setting a cron job on Siteground.
- Setting a cron job on Bluehost.
- Setting a cron job on GoDaddy.
Of course, there are more hosts than what is covered above, but the process when you access the cPanel of your hosting provider is the same.
Method 2: Using crontab
Crontab is for more advanced users and those with SSH access to their servers. Most shared and managed hosting environments do not provide this level of access.
For more information on setting up a cron job using crontab, read this excellent article created by Linode.
Why would I need to use this option?
- More control over how often the task is run.
- Stamps out high CPU usage issues on your server which can be an issue with some hosts.
- Does not run a constant background process that some hosts don’t allow.
- More reliable than using “visitors to your site” as it will run at the interval set regardless of visitors.
Important:
If you are considering using an external cron service (like cron-job.org) to trigger MailPoet’s cron, please be aware of the difference between the available endpoints:
-
/wp-cron.php?mailpoet_router&endpoint=cron_daemon&action=runrequires context and data only available internally from WordPress. External services sending basic HTTP requests to this endpoint will receive a 404 error, as they cannot provide the necessary information or context. -
/wp-cron.php?mailpoet_router&endpoint=cron_daemon&action=pingis a lightweight check and does not trigger sending tasks.
Troubleshooting Linux cron errors
MailPoet will generate the command for you to configure for your Linux cron based on the location of the plugin on your server and your root directory.
However, if you’ve set up the cron job and it doesn’t appear to be running (i.e. emails aren’t sending), then it’s possible you may need to add the full path before php at the start of the command, for example /usr/local/bin/php
The path to the PHP executable can generally be found in your hosting’s cPanel > Advanced > Cron Jobs. If you are unsure about this, please reach out to your hosting support to confirm the path to use for PHP, as well as confirm the location of the file and root directory for the rest of the command.
MailPoet’s own script
This is no longer available for 3.89.0 version or higher.
This used to be an option for versions older than 3.89.0. If you’re using an updated version of the MailPoet plugin, the MailPoet’s own script is no longer available in the plugin’s settings. If you had this option selected, once you update the plugin it will be automatically switched to the “Visitors to your website” option.
The task scheduler runs as a non-stop background process and does not depend on site visitors or require an external source to start. While this method is very accurate and fast, it uses minimal server resources on a constant basis and may not be compatible with certain hosting providers (the list is not exhaustive) that place restrictions on running background processes.