This is a standard practice to avoid hard bounces (invalid or unused addresses) and spam complaints to preserve your reputation as a sender. This applies to all lists, even those with just 100 subscribers.
You risk having your emails ending up in the spam box or getting the MailPoet Sending Service paused for your account otherwise.
We recommend sending the re-confirmation email from MailPoet using another sending provider (especially if MailPoet Sending Service is paused for your account) by temporarily changing the sending method to “Other” in the MailPoet > Settings > Send With… tab or from your personal email client.
When is it necessary?
- You want to start sending newsletters to your contacts for the first time instead of using your personal or professional email account;
- You want to email professional contacts with MailPoet instead of your professional inbox, like customers you’ve had for several years;
- You want to email your WooCommerce customers for the first time;
- You haven’t sent any emails to a mailing list in over a year.
Steps to Reconfirm your subscribers from MailPoet
It takes just a few minutes to ask your contacts to join your list and confirm that they really want to receive your emails with MailPoet.
Here are the steps you should take:
1. Clean your list
If you haven’t emailed your list recently or at all, many addresses may no longer be valid. Use a list cleaning service to remove invalid addresses before proceeding.
For recommended services and detailed steps, refer to MailPoet’s list hygiene guide.
2. Temporarily change your sending method to “Other”
Instead of MailPoet Sending Service, use your host as the sender by going to the MailPoet > Settings > Send With… tab and selecting “Other”.

This prevents potential spam complaints from old subscribers from affecting your account and reputation. When using your own host or sending method, MailPoet’s sending policies do not apply, so you won’t get your sending paused for sending this first email to reconfirm your subscribers.
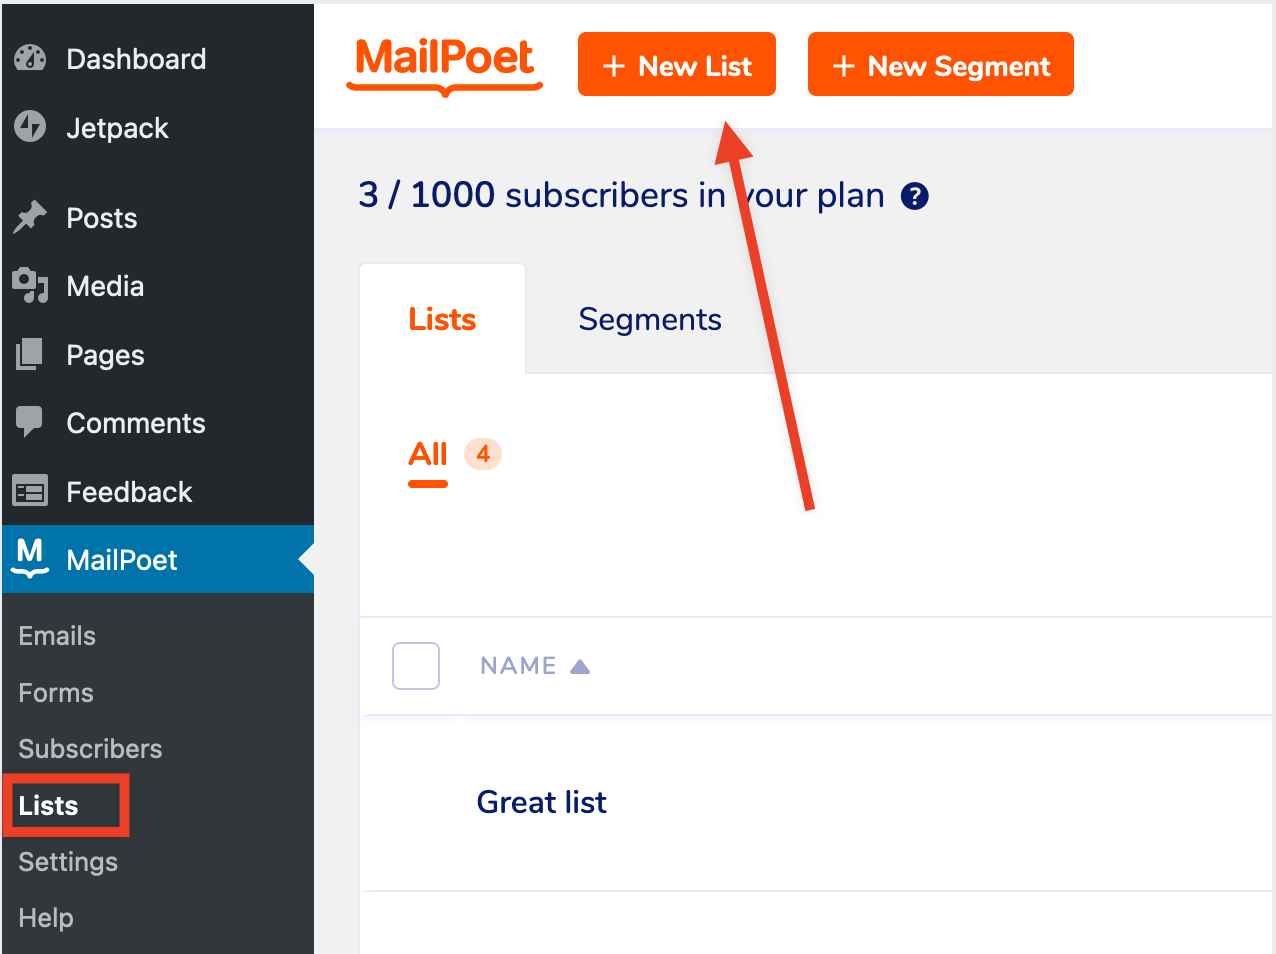
3. Create a new list
In your WordPress admin, go to MailPoet > Lists, and click on “Add New” to create a new list that will contain only the confirmed subscribers:
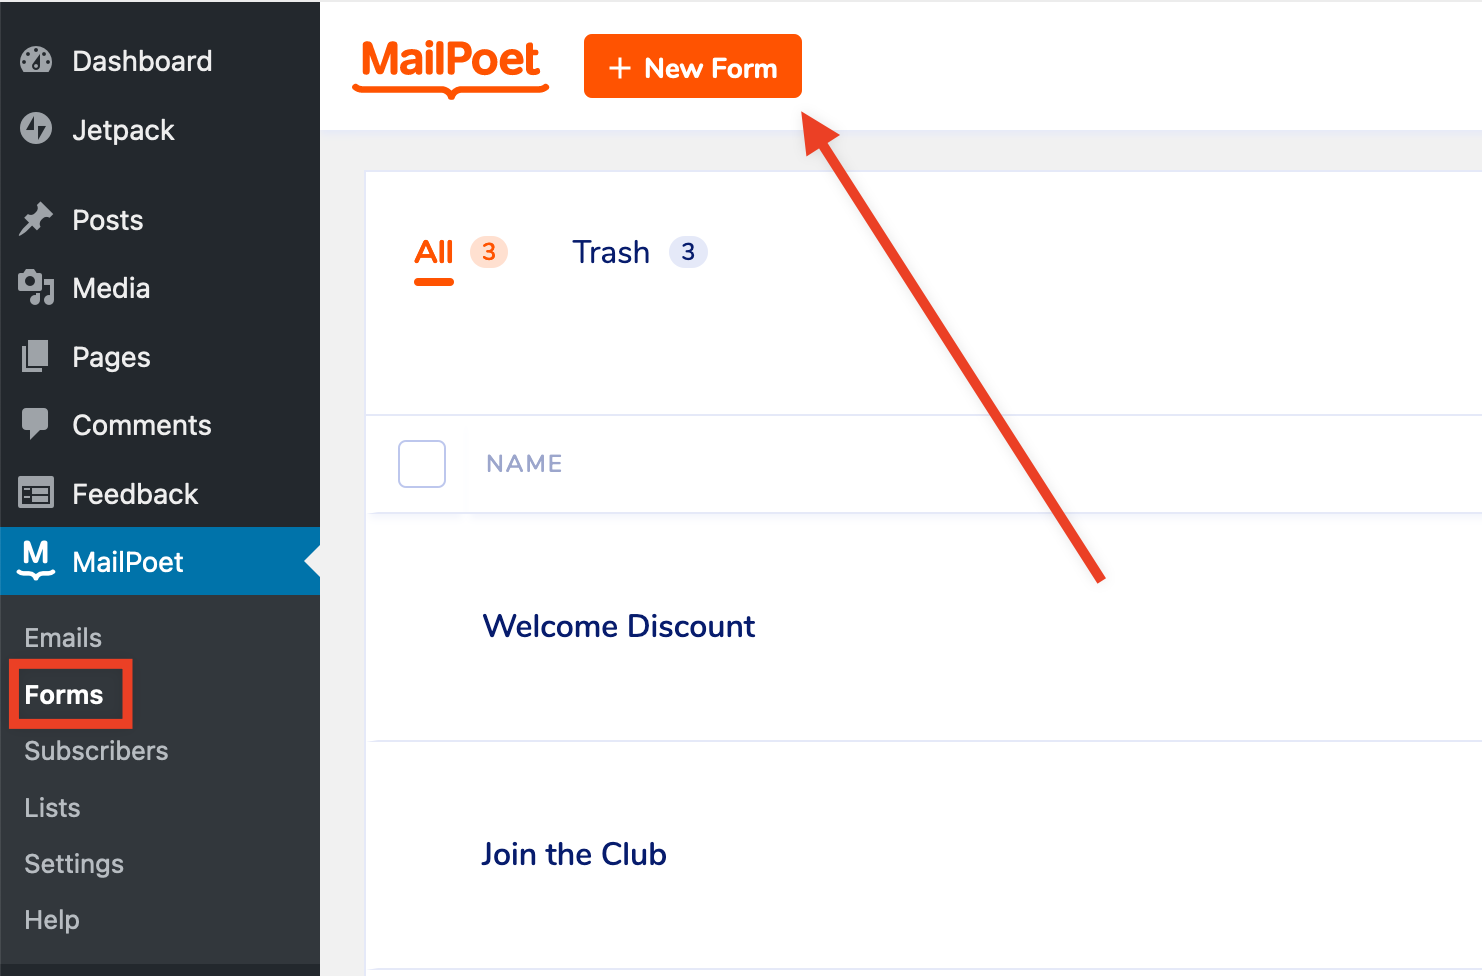
4. Edit or Create a Form

5. Send a Reconfirmation Email
Craft and send an email to your old list, directing subscribers to re-subscribe through your new form.
Use this email to re-introduce yourself and ask your subscribers to reconfirm their subscription by signing up for your mailing list if they are interested.
Include in your email a link to the new signup form for the new list. Send your next emails to this new list only.
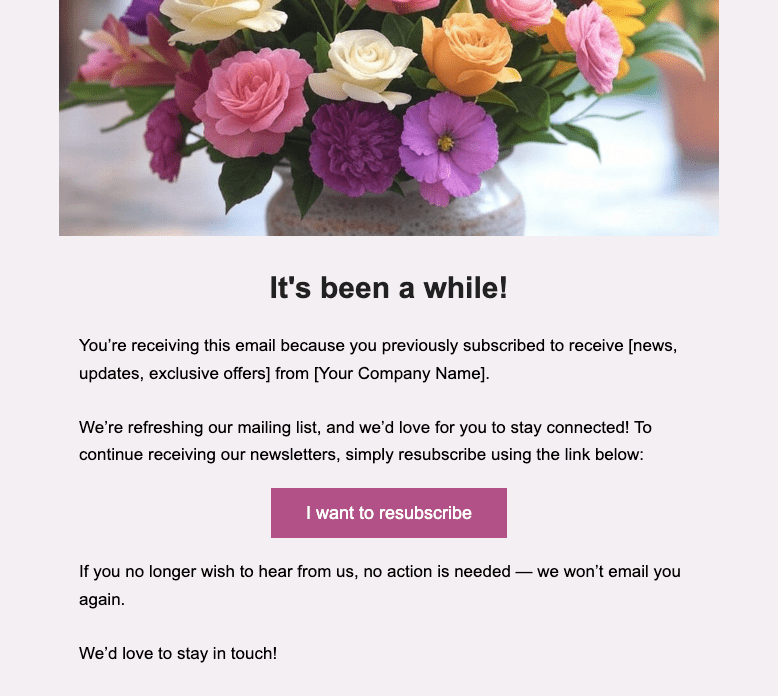
Here’s a reconfirmation email template based on these suggestions:
Subject: Confirm you want to keep receiving our newsletters
Body:
Hi there,
It’s been a while! You’re receiving this email because you previously subscribed to receive [news, updates, exclusive offers] from [Your Company Name].
We’re refreshing our mailing list, and we’d love for you to stay connected! To continue receiving our newsletters, simply resubscribe using the link below:
[I want to resubscribe]
If you no longer wish to hear from us, no action is needed — we won’t email you again.
We’d love to stay in touch!
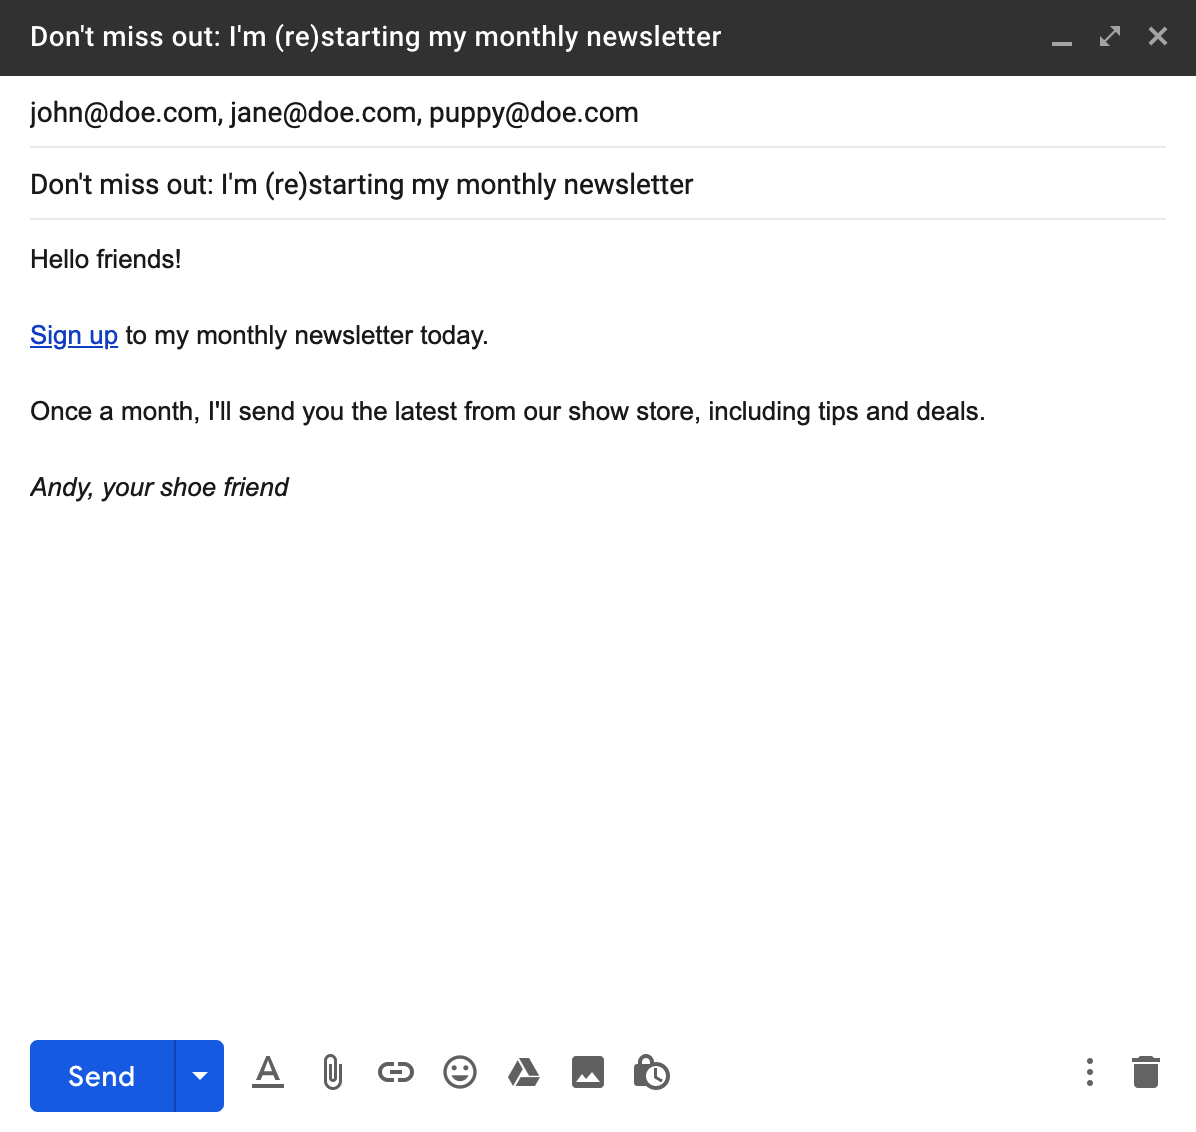
Example:
Alternative Method
You can follow the steps above and send the reconfirmation email from your personal inbox (and not from the MailPoet plugin) with a link to the page where your new form is placed.
For example:
What to expect?
You can expect anything from 10% to more than half your contacts signing up depending on how close you are to your contacts, how old your relationship is with them, and how many contacts you have.
You might want to email your contacts twice in a week to make sure your recipients have had the chance to read your email and join your list.
As a result, you’ll get a clean list full of engaged, interested subscribers. It should clear up any spam issues but also will let you see a much higher rate of engagement and clicks on the emails you are sending out, and you will be better able to understand and work with your audience.